Potatoes are one of the most popular and versatile vegetables in the world. They can be boiled, baked, mashed, fried, roasted, and more. But did you know that you can also grow your own potatoes in Florida?
Growing potatoes in Florida can be fun and rewarding, as well as a great way to save money and enjoy fresh produce. However, it also requires some planning and preparation, as potatoes have specific needs and challenges in the Sunshine State.
In this article, we will show you how to grow potatoes in Florida successfully, from choosing the right varieties and planting time to preparing the soil and harvesting the tubers. We will also share some tips and tricks to avoid common problems and pests that can affect your potato crop.
You will also find secret tips to make very delicious and crisp fries like in Burger King at the end of the article.
Let’s get started!
Why Grow Potatoes in Florida?
There are many reasons why you might want to grow potatoes in Florida. Here are some of them:
Potatoes are nutritious and delicious. They are rich in carbohydrates, fiber, vitamin C, potassium, and other minerals. They can also help lower blood pressure, regulate blood sugar, and prevent scurvy.
Potatoes are easy to grow and store. They do not require much care or attention once planted, and they can last for months in a cool and dark place after harvesting.
Potatoes are adaptable and diverse. You can grow different types of potatoes in Florida, such as white-skinned, red-skinned, yellow-fleshed, or purple-fleshed varieties. You can also use them for various dishes and cuisines, from salads and soups to fries and pies.
Potatoes are a good source of income. If you have a large garden or farm, you can sell your excess potatoes at farmers’ markets or local stores. You can also make value-added products from your potatoes, such as chips, vodka, or starch.
Choosing the Right Potato Varieties for Florida
The first step to growing potatoes in Florida is to choose the right varieties. There are two main types of potatoes: Irish potatoes and sweet potatoes.
Irish potatoes are also called white potatoes or regular potatoes. They have thin skins and white or yellow flesh. They are usually grown in cooler climates and need about three to four months to mature.
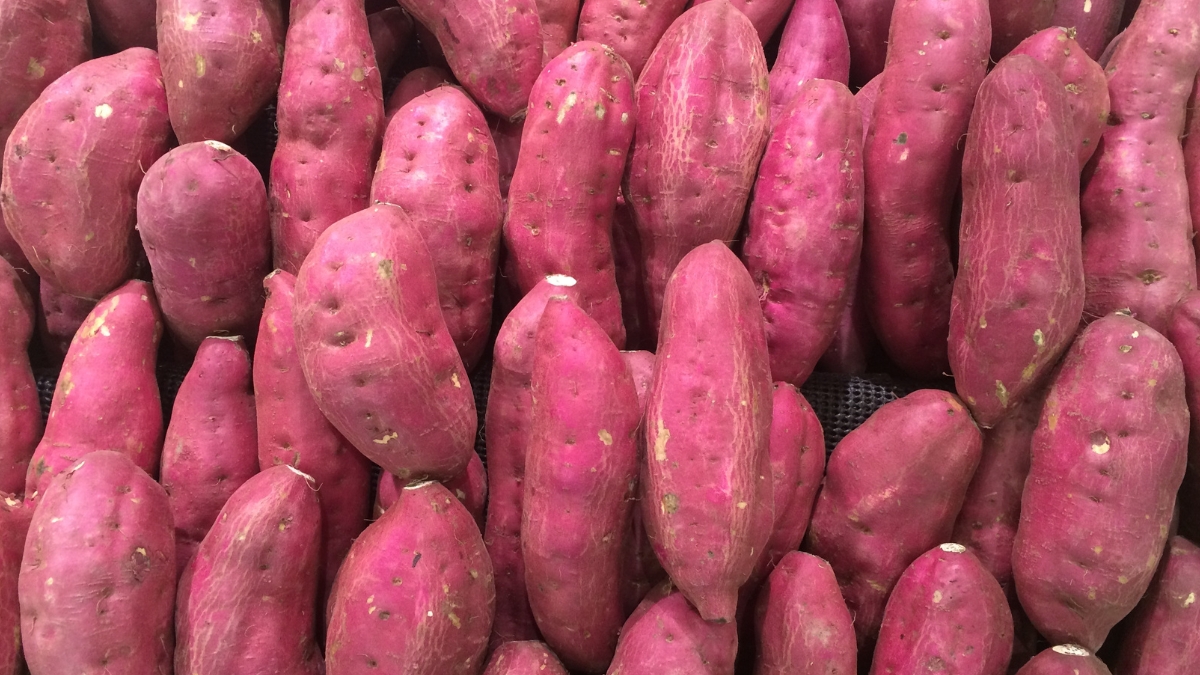
Sweet potatoes are not actually related to Irish potatoes. They have thick skins and orange or purple flesh. They are usually grown in warmer climates and need about four to six months to mature.
Florida can grow both types of potatoes, but they have different planting times and requirements.
Irish Potatoes
Irish potatoes are best grown in Florida during the winter and spring months when the temperatures are between 68°F and 77°F. Higher temperatures can slow down or stop the potato growth.
Some of the most popular Irish potato varieties for Florida are:
LaChipper: This is the standard commercial white-skinned potato in Florida. It has a buff to white skin color and a moderately smooth skin texture. It produces round tubers with shallow eyes. It yields well under winter growing conditions.
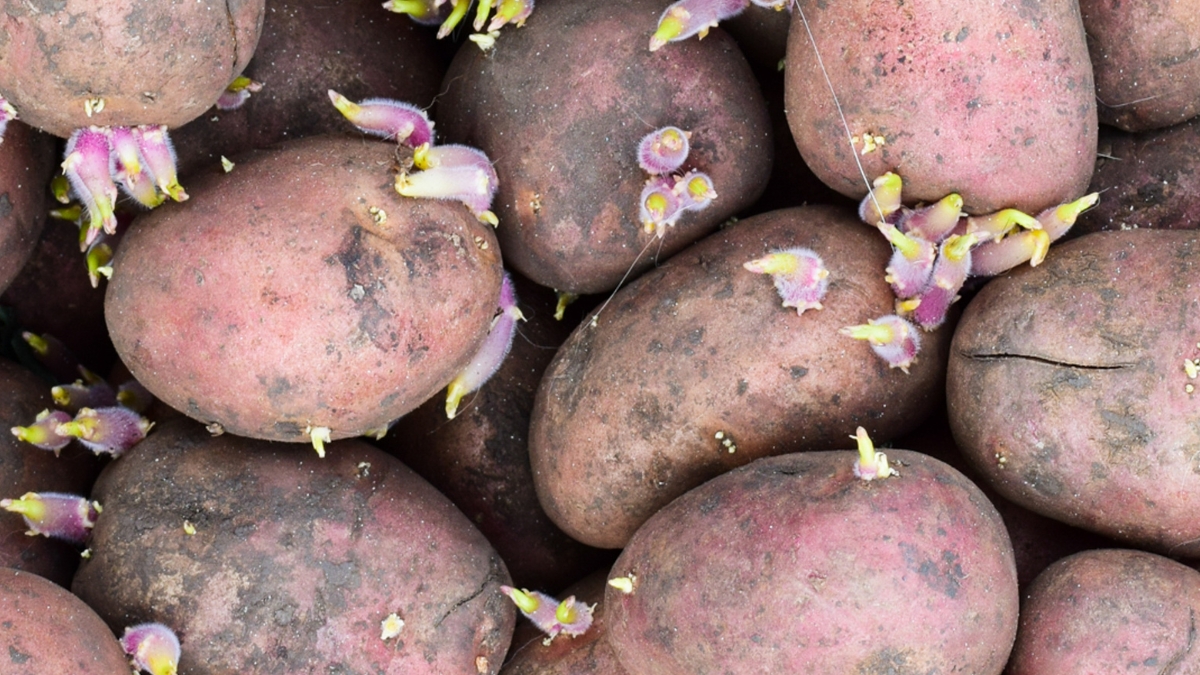
Red Pontiac: This is a red-skinned potato with white flesh. It has a smooth skin texture and deep eyes. It produces round to oblong tubers that are good for boiling, baking, or frying.
Yukon Gold: This is a yellow-skinned potato with yellow flesh. It has a smooth skin texture and shallow eyes. It produces round to oval tubers that are good for mashing, roasting, or grilling.
You can plant Irish potatoes in Florida from October to January in South Florida, from November to February in Central Florida, and from January to February in North Florida.
Sweet Potatoes
Sweet potatoes are best grown in Florida during the summer months when the temperatures are above 80°F. They can tolerate heat and drought better than Irish potatoes.
Some of the most common sweet potato varieties in Florida are:
Beauregard: This is a widely grown orange-fleshed sweet potato. It has rose-colored skin and a moist texture. It produces large tubers that are good for baking, boiling, or frying.
Boniato: This is a white-fleshed sweet potato that is popular in Cuban cuisine. It has cream-colored skin and a dry texture. It produces medium-sized tubers that are good for boiling or frying.
Centennial: This is an orange-fleshed sweet potato that is similar to Beauregard but more resistant to diseases. It has copper-colored skin and a moist texture. It produces medium-sized tubers that are good for baking, boiling, or frying.
You can plant sweet potatoes in Florida from December to September in South Florida, from February to June in Central Florida, and from March to June in North Florida.
Both types of potatoes have their advantages and disadvantages. Irish potatoes are more familiar and versatile, but they are also more prone to diseases and pests. Sweet potatoes are more tolerant and productive, but they are also more difficult to store and prepare.
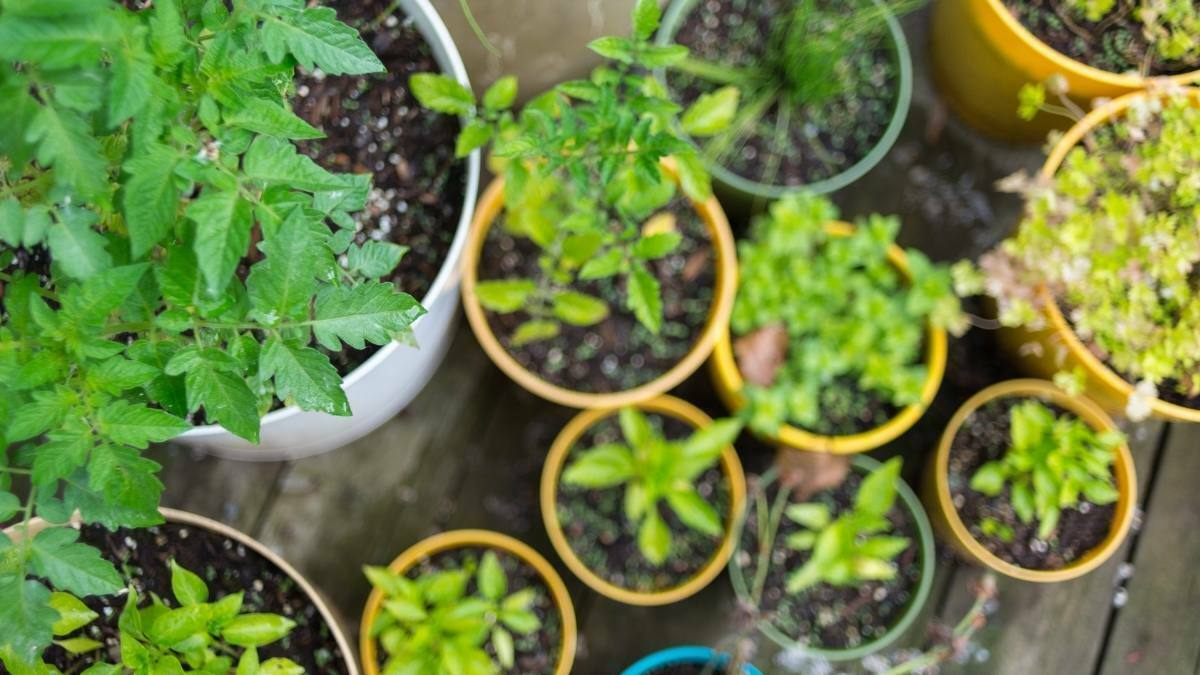
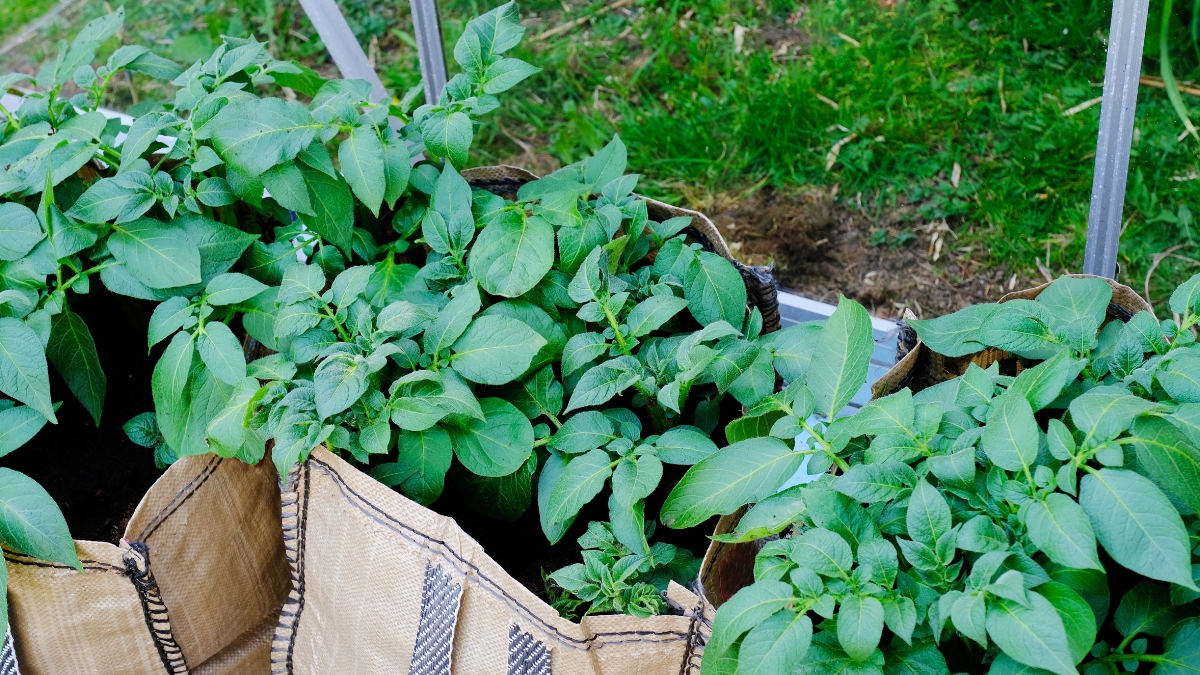
The best type of potato for you depends on your personal preference, your location, your climate, and your available space. You can also try growing both types of potatoes in different seasons to see which one works better for you.
How to Choose the Best Potato Varieties for Florida?
Not all potato varieties are suitable for growing in Florida. Some varieties may not perform well or produce good quality tubers under Florida conditions. Therefore, it is important to choose potato varieties that are adapted to your region and your needs.
Here are some factors to consider when choosing potato varieties for Florida:
Maturity:
This refers to how long it takes for a potato variety to reach harvestable size. Early-maturing varieties (60 to 80 days) are ideal for short-season areas or multiple cropping systems. Mid-maturing varieties (80 to 100 days) are suitable for most areas and conditions. Late-maturing varieties (100 days or more) are best for long-season areas or storage purposes.
Yield:
This refers to how many tubers a potato variety can produce per plant or per area. High-yielding varieties can give you more food or income from your garden or farm. However, yield may also depend on other factors such as soil fertility, water availability, pest management, etc.
Quality:
This refers to how good the tubers look and taste after harvesting. Quality may include aspects such as shape, size, color, texture, flavor,
The Potato Varieties Not Suitable for Florida
Florida can grow both Irish potatoes and sweet potatoes, but not all varieties of these potatoes are suitable for Florida’s climate and soil conditions. Some potato varieties may take too long to mature, be more prone to pests and diseases, or have poor quality and yield in Florida.
Some of the potato varieties not suitable for Florida are:
Russet potatoes:
These are the most common potatoes grown in the U.S., especially for french fries and baking. They have brown, rough skin and white, starchy flesh. However, in Florida, this variety does not grow well because it takes a long time to produce tubers (up to four months). The late maturity makes it more susceptible to disease and pest pressures as well as inclement weather conditions.
Kennebec potatoes:
These are white-skinned potatoes with smooth skins and shallow eyes. They are good for boiling, baking, or frying. However, in Florida, this variety does not perform well because it is susceptible to heat stress and drought.
Purple Majesty potatoes: These are purple-skinned and purple-fleshed potatoes with high antioxidant content. They are good for roasting, mashing, or salads. However, in Florida, this variety does not thrive because it is sensitive to high temperatures and humidity.
These are some examples of potato varieties not suitable for Florida. You should always check with your local extension office or nursery for more information on the best potato varieties for your area and growing conditions.
What Tools I Need to Grow, Care, and Harvest Potatoes
Growing potatoes requires some basic tools and equipment that can help you prepare the soil, plant the seed pieces, care for the plants, and harvest the tubers. Here are some of the tools you may need and their approximate costs for new beginners:
- Spade or shovel: This is used to dig the soil and make trenches for planting potatoes. It can also be used to hill up the soil around the plants as they grow. A good spade or shovel can cost around $20-$40.
- Garden fork: This is used to loosen the soil and harvest the potatoes without damaging them. It can also be used to aerate the soil and remove weeds. A good garden fork can cost around $20-$40.
- Hoe: This is used to weed the potato plants by hand or with a hoe. It can also be used to hill up the soil around the plants as they grow. A good hoe can cost around $10-$30.
- Rake: This is used to level the soil and remove any debris or rocks before planting potatoes. It can also be used to hill up the soil around the plants as they grow. A good rake can cost around $10-$30.
- Trowel: This is used to dig small holes for planting seed pieces or transplanting potato plants. It can also be used to check the size of the tubers before harvesting. A good trowel can cost around $5-$15.
- Pruning shears: These are used to cut off any diseased or damaged parts of the potato plants. It can also be used to cut off any flowers or fruits that may form on the plants, as they can reduce tuber yield and quality. A good pair of pruning shears can cost around $10-$30.
- Gloves: These are used to protect your hands from dirt, cuts, and blisters when working with potato plants. They can also help you grip the tools better and prevent slipping. A good pair of gloves can cost around $5-$15.
- Basket or bucket: This is used to collect and transport the harvested potatoes from the garden to your home. You can use any sturdy container that can hold enough weight and volume of potatoes. A good basket or bucket can cost around $5-$15.
These are some of the tools you may need to grow, care, and harvest potatoes. You don’t have to buy them all at once, but you should have them ready when you need them. You can also borrow them from your friends or neighbors or look for second-hand ones at garage sales or thrift stores.
Preparing the Soil for Potatoes
To grow healthy potatoes, you need to prepare the soil properly before planting. Potatoes thrive in loose, well-drained, slightly acidic soil (pH 5 6). Most Florida soils will not need much treatment unless you live in an area with a high water table where periodic flooding occurs.
Here are some steps to prepare the soil for potatoes:
Loosen the soil with a spade or tiller to a depth of 12 inches. This will help the roots and tubers grow freely and prevent compaction.
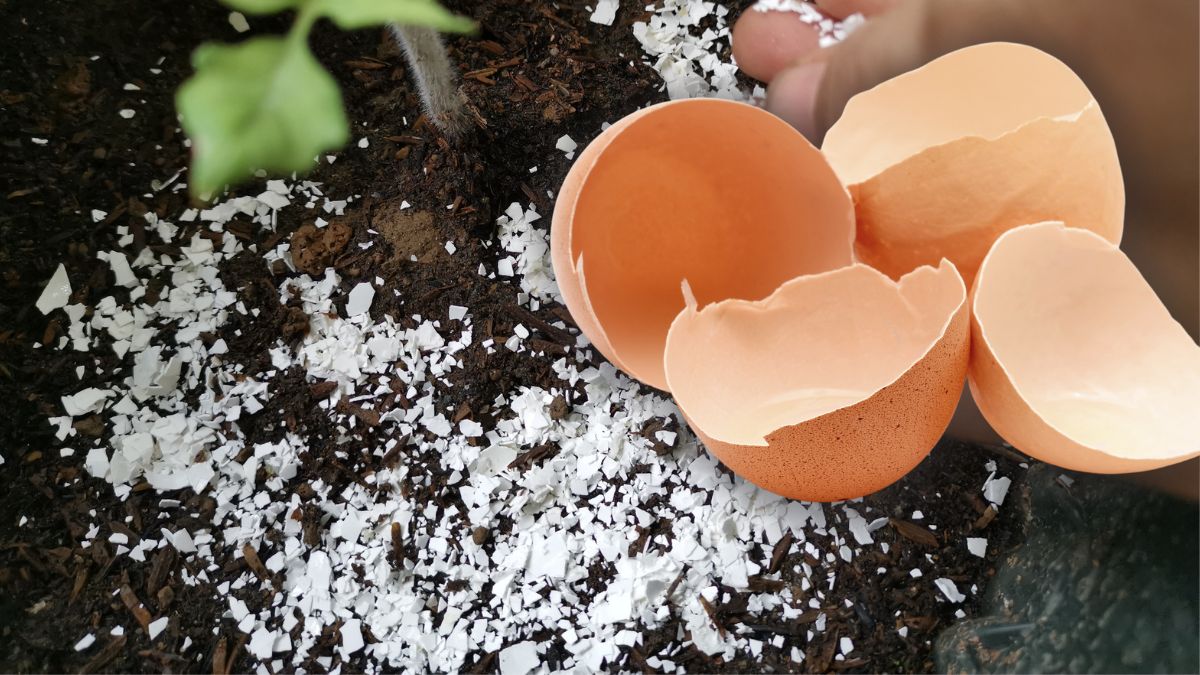
Add some compost or manure to improve drainage and fertility. You can also add some organic fertilizer or bone meal if needed.
Make raised beds or hills about 6 inches high and 3 feet apart. This will help prevent waterlogging and improve air circulation.
If you have clay soil or poor drainage, you can also add some sand or perlite to improve drainage⁴.
Planting Potatoes
Once you have prepared the soil, you can start planting your potatoes. You can either buy certified seed potatoes from a nursery or garden center or use organic potatoes from the grocery store that have sprouted eyes.
Here are some tips on how to plant potatoes:
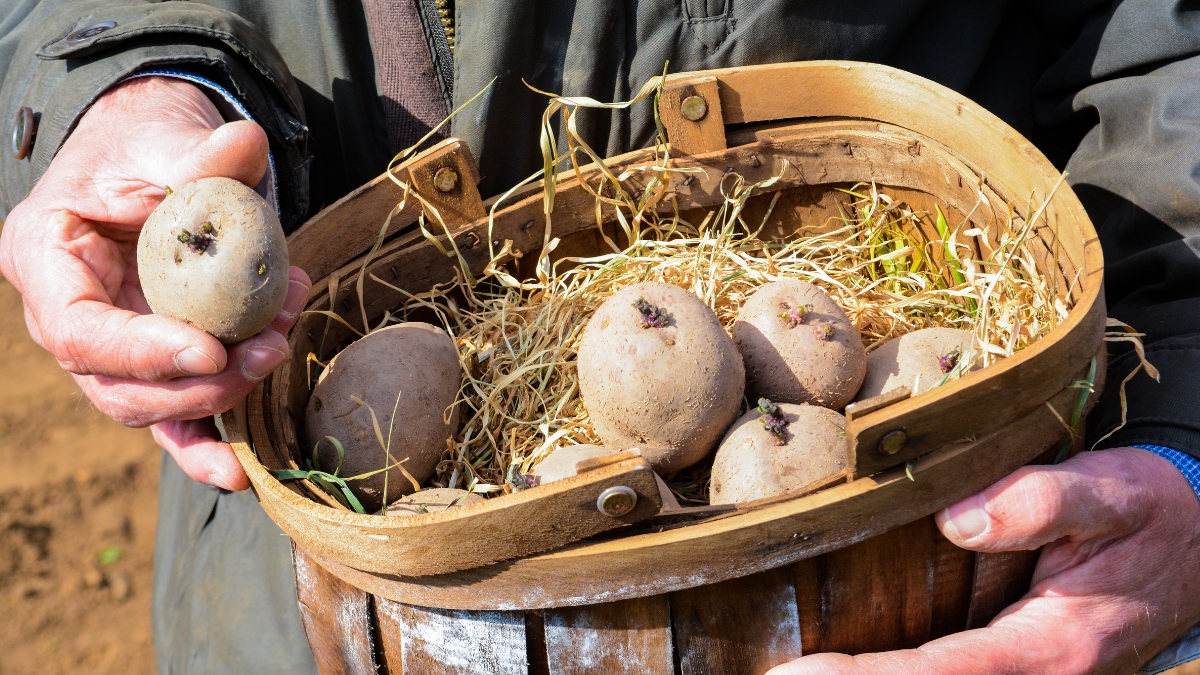
- Cut large seed potatoes into smaller pieces with at least one eye each. Make sure each piece is about 1.5 inches across.
- Let the cut pieces dry for a day or two before planting. This will help prevent rotting and diseases.
- Plant the seed pieces about 4 inches deep and 12 inches apart in rows that are 3 feet apart. Make sure the eyes face up.
- Cover the seed pieces with soil and water them well.
- Wait for the sprouts to emerge from the soil after about two weeks.
Caring for Potato Plants
After planting your potatoes, you need to care for them regularly until harvest time. Here are some things you need to do:
Water your potato plants once or twice a week depending on the weather. Keep the soil moist but not soggy.
Hill up your potato plants by adding more soil around them as they grow. This will help prevent sun exposure and greening of the tubers.
Weed your potato plants by hand or with a hoe. Avoid using herbicides as they may harm your plants.
Mulch your potato plants with straw or leaves to conserve moisture and prevent weeds.
Fertilize your potato plants with a balanced fertilizer every four weeks until flowering. Avoid using too much nitrogen, as it may promote leaf growth at the expense of tuber development.
Monitor your potato plants for pests and diseases such as aphids, Colorado potato beetles, wireworms, nematodes, blight, scab, rot, etc.. Use organic methods such as hand-picking, traps, neem oil, etc., to control them.
How to Water and Fertilize Potatoes
Watering and fertilizing potatoes are essential for their growth and development. Potatoes need regular watering and feeding to produce healthy and abundant tubers.
Watering Potatoes
Potatoes need moderate soil moisture levels throughout the growing season. You should water your potato plants once or twice a week depending on the weather. Keep the soil moist but not soggy, as too much water can cause rotting and diseases.
Here are some tips on how to water potatoes:
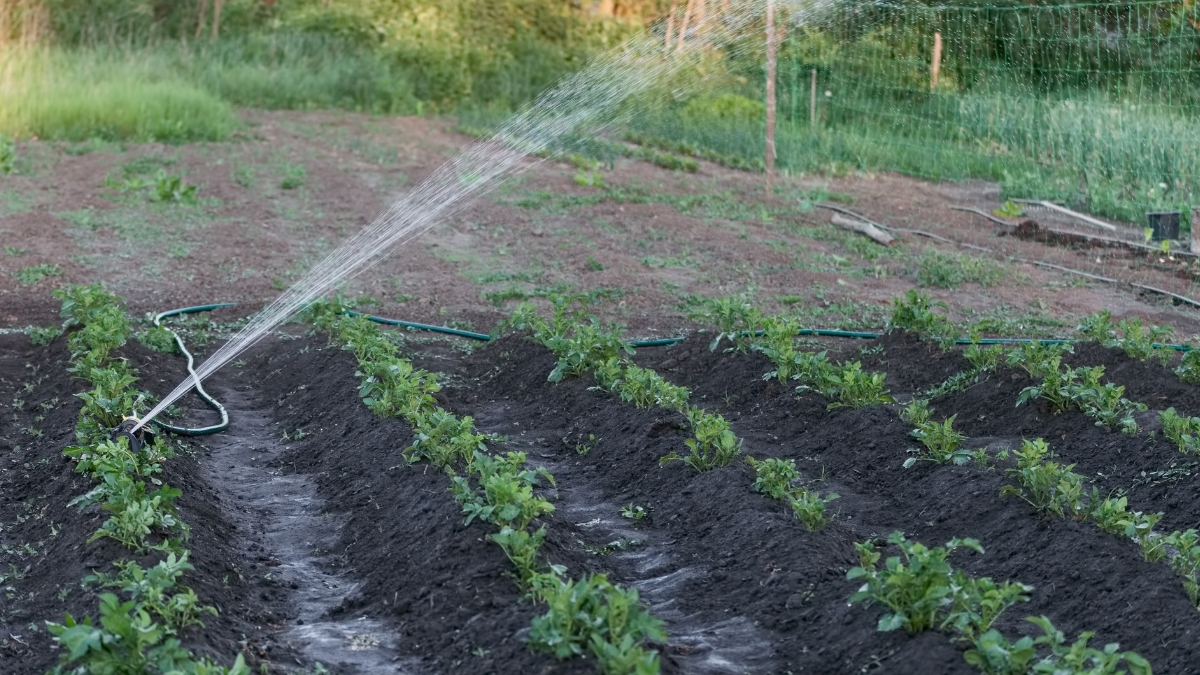
Use a soaker hose, drip irrigation, or sprinkler to water your potato plants. Avoid overhead watering as it can spread diseases and wash away the soil.
Water your potato plants early in the morning or late in the evening to reduce evaporation.
Water your potato plants deeply and thoroughly, soaking the soil to a depth of 6 inches.
Check the soil moisture regularly by inserting your finger into the soil. If it feels dry, it’s time to water.
Reduce watering when the plants start flowering, as this signals the start of tuber formation. Stop watering when the plants start dying back, as this signals the end of tuber growth.
Fertilizing Potatoes
Potato plants are heavy feeders and require adequate nutrition throughout the growing season. You should fertilize your potato plants with a balanced fertilizer every four weeks until flowering. Avoid using too much nitrogen, as it may promote leaf growth at the expense of tuber development.
Here are some ways to fertilize potatoes:
Use a granular fertilizer with a ratio of 10-10-10 or 8-24-24. Apply it to the soil around the plants according to the manufacturer’s directions.
Use a liquid fertilizer with a ratio of 20-20-20 or 15-30-15. Mix it with water and apply it to the soil with a watering can or hose-end applicator. Apply it to potatoes about once a month.
Use an organic fertilizer such as compost, manure, or bone meal. Add it to the soil before planting or during hilling.
Fertilizing potatoes will help them grow faster and produce larger and more nutritious tubers. However, do not over-fertilize potato plants as this can actually damage the plants and reduce yields.
Harvesting and Storing Potatoes
The time to harvest your potatoes depends on the type and variety of potatoes you planted.
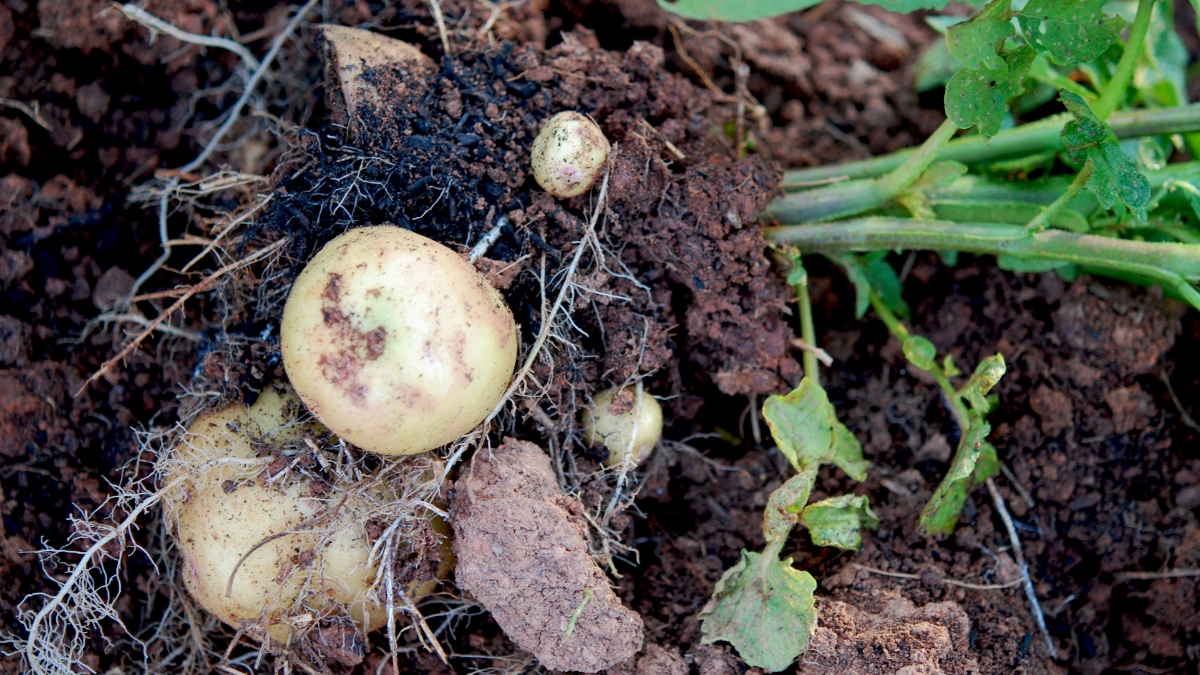
For Irish potatoes, you can harvest them when they reach your desired size. You can check by digging up one plant carefully and inspecting the tubers.
For sweet potatoes, you can harvest them when their vines start turning yellow or brown. You can also check by digging up one plant carefully and inspecting the tubers.
Here are some steps to harvest your potatoes:
Dig up your potato plants carefully with a spade or fork. Try not to damage or bruise the tubers.
Shake off any excess soil from the tubers. Do not wash them as this may cause rotting.
Sort out any damaged or diseased tubers and discard them.
Cure your potato tubers by letting them dry in a cool, dark place for about two weeks. This will help heal any wounds and toughen their skin.
Store your potato tubers in a cool (40°F 50°F), dark (to prevent greening), humid (to prevent shriveling) place such as a basement or cellar. Do not store them near apples or onions, as they may affect their flavor.
Pest Control for Potatoes
Potatoes are susceptible to various pests and diseases that can reduce their quality and yield. Some of the most common pests and diseases that affect potatoes in Florida are:
Aphids: These are small, soft-bodied insects that suck the sap from the leaves and stems of potato plants. They can transmit viruses and cause curling, yellowing, and stunting of the plants.
Colorado potato beetles: These are yellow and black striped beetles that feed on the leaves and stems of potato plants. They can defoliate and kill the plants if left unchecked.
Wireworms: These are yellow-brown larvae of click beetles that bore into the tubers and cause holes and tunnels. They can reduce the quality and marketability of the tubers.
Nematodes: These are microscopic worms that live in the soil and feed on the roots of potato plants. They can cause root galls, stunting, wilting, and yield loss.
Blight: This is a fungal disease that causes brown spots on the leaves and stems of potato plants. It can spread rapidly and kill the plants in wet and humid conditions.
Scab: This is a bacterial disease that causes rough patches on the skin of the tubers. It can reduce the quality and appearance of the tubers.
Rot: This is a fungal or bacterial disease that causes softening and decay of the tubers. It can occur in the field or in storage due to poor drainage, injuries, or infections.
To prevent and control these pests and diseases, you can use the following methods:
Crop rotation:
This is one of the best preventive measures against pests and diseases. Potatoes should be planted in the same part of the garden only once every three years. This will help break the life cycle of pests and diseases that may live in the soil or nearby weeds.
Sanitation:
This involves removing weeds, debris, and infected plants from the garden. Weeds can harbor pests and diseases that can spread to potato plants. Debris and infected plants can serve as sources of inoculum for diseases.
Resistant varieties:
This involves choosing potato varieties that have some resistance or tolerance to pests and diseases. For example, ‘Centennial’ is a sweet potato variety that is resistant to nematodes. You can check with your local extension office for more information on resistant varieties for your area.
Cultural practices:
This involves providing optimal growing conditions for potato plants, such as proper spacing, watering, hilling, mulching, etc. This will help improve plant health and vigor and reduce the stress that may make them more susceptible to pests and diseases.
Organic methods:
This involves using natural or organic methods to control pests and diseases, such as hand-picking, traps, neem oil, etc. These methods are safer for humans, animals, and the environment than synthetic chemicals.
Chemical methods:
This involves using synthetic pesticides to control pests and diseases when other methods are not effective or feasible. You should always follow the label instructions carefully when using pesticides and wear protective clothing and equipment. You should also avoid applying pesticides when bees or other beneficial insects are active, as they may be harmed by them.
Pest control for potatoes is important to ensure healthy and productive plants. By using a combination of preventive and curative methods, you can protect your potatoes from pests and diseases.
Potato Fungus in Florida
Potato fungus is a term that refers to various fungal diseases that can affect potato plants and tubers. Potato fungus can cause symptoms such as spots, lesions, wilting, rotting, and reduced yield and quality. Potato fungus can be spread by wind, rain, insects, soil, or infected plant material.
Some of the most common potato fungal diseases in Florida are:
Early blight: This is caused by the fungus Alternaria solani. It causes brown spots with concentric rings on the leaves and stems of potato plants. It can also cause tuber rot.
Late blight: This is caused by the fungus Phytophthora infestans. It causes dark, water-soaked spots on the leaves and stems of potato plants. It can also cause tuber rot and decay.
Rhizoctonia: This is caused by the fungus Rhizoctonia solani. It causes black scurf or patches on the skin of the tubers. It can also cause stem canker and stunting of the plants.
To prevent and control potato fungus, you can use the following methods:
Choose resistant varieties: Some potato varieties have some resistance or tolerance to fungal diseases. For example, ‘Centennial’ is a sweet potato variety that is resistant to nematodes. You can check with your local extension office for more information on resistant varieties for your area.
Practice crop rotation: This involves planting potatoes in different parts of the garden every year. This will help reduce the build-up of fungal spores in the soil and prevent disease outbreaks.
Maintain good sanitation: This involves removing weeds, debris, and infected plants from the garden. Weeds can harbor fungal spores that can infect potato plants. Debris and infected plants can serve as sources of inoculum for fungal diseases.
Apply fungicides: This involves using synthetic or organic fungicides to protect potato plants from fungal diseases. You should always follow the label instructions carefully when using fungicides and wear protective clothing and equipment. You should also avoid applying fungicides when bees or other beneficial insects are active, as they may be harmed by them.
Potato fungus is a serious problem that can affect potato production and quality in Florida. By using a combination of preventive and curative methods, you can protect your potatoes from fungal diseases.
Storage Conditions for Potatoes
Potatoes can be stored for several months after harvest if they are properly cured and stored in suitable conditions. Curing is a process that allows cuts and bruises on the tubers to heal and prevents rotting. Storage conditions affect the quality and shelf life of potatoes.
Here are some steps to cure and store potatoes:
- Dig up your potato plants carefully with a spade or fork. Try not to damage or bruise the tubers.
- Shake off any excess soil from the tubers. Do not wash them as this may cause rotting.
- Sort out any damaged or diseased tubers and discard them.
- Cure your potato tubers by letting them dry in a cool (60°F–65°F), dark, well-ventilated place for 10–14 days after harvest. This will help heal any wounds and toughen their skin.
- Store your potato tubers in a cool (40°F–50°F), dark (to prevent greening), humid (to prevent shriveling) place such as a basement or cellar. Do not store them near apples or onions, as they may affect their flavor.
- Check your potato tubers regularly for signs of sprouting or rotting. Remove any sprouted or rotten tubers as soon as possible to prevent spreading.
Storage conditions for potatoes are important to maintain their quality and freshness. By following these steps, you can store your potatoes for several months after harvest.
Conclusion
Growing potatoes in Florida is not hard if you follow these steps:
- Choose the right potato varieties for Florida
- Prepare the soil for potatoes
- Plant your seed pieces
- Care for your potato plants
- Harvest and store your potato tubers
By growing your own potatoes in Florida, you can enjoy fresh and delicious potatoes all year round. You can also save money on groceries and reduce food waste.
We hope this article has helped you learn how to grow potatoes in Florida successfully. If you have any questions or comments, please let us know below.
Happy gardening!
FAQ About Growing Potatoes in Florida
What are the best potato varieties for Florida?
Florida can grow both Irish potatoes and sweet potatoes, but they have different planting times and requirements. Some of the best Irish potato varieties for Florida are LaChipper, Red Pontiac, and Yukon Gold. Some of the best sweet potato varieties for Florida are Beauregard, Boniato, and Centennial
When should I plant potatoes in Florida?
Irish potatoes are best planted in Florida during the winter and spring months when the temperatures are between 68°F and 77°F. Sweet potatoes are best planted in Florida during the summer months when the temperatures are above 80°F.
You can plant Irish potatoes in Florida from October to January in South Florida, from November to February in Central Florida, and from January to February in North Florida. You can plant sweet potatoes in Florida from December to September in South Florida, from February to June in Central Florida, and from March to June in North Florida.
How do I prepare the soil for potatoes?
Potatoes thrive in loose, well-drained, slightly acidic soil (pH 5 6). You can prepare the soil for potatoes by loosening it with a spade or tiller to a depth of 12 inches, adding some compost or manure to improve drainage and fertility, making raised beds or hills about 6 inches high and 3 feet apart, and adding some sand or perlite if you have clay soil or poor drainage.
How do I plant potatoes?
You can either buy certified seed potatoes from a nursery or garden center or use organic potatoes from the grocery store that have sprouted eyes. You can cut large seed potatoes into smaller pieces with at least one eye each, let them dry for a day or two before planting, plant them about 4 inches deep and 12 inches apart in rows that are 3 feet apart, cover them with soil and water them well, and wait for the sprouts to emerge from the soil after about two weeks.
How do I care for potato plants?
You need to water your potato plants once or twice a week depending on the weather, hill up your potato plants by adding more soil around them as they grow, weed your potato plants by hand or with a hoe, mulch your potato plants with straw or leaves to conserve moisture and prevent weeds, fertilize your potato plants with a balanced fertilizer every four weeks until flowering, and monitor your potato plants for pests and diseases such as aphids, Colorado potato beetles, wireworms, nematodes, blight, scab, rot, etc.
How do I harvest and store potatoes?
You can harvest Irish potatoes when they reach your desired size and sweet potatoes when their vines start turning yellow or brown. You can dig up your potato plants carefully with a spade or fork, shake off any excess soil from the tubers, sort out any damaged or diseased tubers and discard them, cure your potato tubers by letting them dry in a cool, dark place for about two weeks, and store your potato tubers in a cool (40°F 50°F), dark (to prevent greening), humid (to prevent shriveling) place such as a basement or cellar.
BONUS: The Secret Tips to Make Crispy and Delicious Fries Like in Burger King and McDonald’s with Your Own Organic Potatoes
If you love the crispy and delicious fries from Burger King and McDonald’s, you may wonder how they achieve that perfect texture and flavor. The good news is that you can make fries just as good or even better at home with your own organic potatoes. All you need are some simple tips and tricks that will help you turn your potatoes into fries that rival the fast food giants.
Here are some of the secret tips to make crispy and delicious fries like in Burger King and McDonald’s with your own organic potatoes:
Choose the right potatoes: The best potatoes for making fries are starchy ones like Russet or Idaho. They have a high starch content that helps them crisp up and stay fluffy inside. Avoid waxy potatoes like red or yellow ones, as they have a low starch content that makes them soggy and limp. You can achieve nearly the same taste and quality with your own potato variety in Florida by following the steps here:
Cut them evenly: To ensure even cooking and browning, cut your potatoes into thin and uniform strips. You can use a knife, a mandoline, or a French fry cutter to do this. Aim for a thickness of about 1/4 inch or less.
Soak them in water: Soaking your potatoes in cold water helps get rid of the excess starch, which makes them crispier. It also prevents them from oxidizing and turning brown. Soak them for at least 30 minutes or up to overnight in the fridge.
Dry them well: Before frying your potatoes, make sure to dry them well with paper towels or a clean kitchen towel. This will remove any excess moisture that can cause splattering and lower the oil temperature.
Fry them twice: The secret to making fries that are crispy on the outside and soft on the inside is to fry them twice. The first fry is at a lower temperature (about 325°F) to cook the potatoes through. The second fry is at a higher temperature (about 375°F) to crisp them up and brown them. You can use a deep-fryer, a large pot, or a skillet with enough oil to cover the potatoes. Fry them in small batches to avoid overcrowding and lower the oil temperature.
Season them well: As soon as you take your fries out of the oil, season them well with salt and any other spices you like. You can use garlic powder, onion powder, paprika, cayenne pepper, or even sugar for a sweet and salty contrast. Toss them well to coat them evenly.
Enjoy them hot: Fries are best enjoyed when they are hot and fresh out of the oil. If you need to keep them warm until serving, you can place them on a baking sheet in a 200°F oven. Avoid covering them with foil or paper towels, as this will trap steam and make them soggy.
These are some of the secret tips to make crispy and delicious fries like in Burger King and McDonald’s with your own organic potatoes. You can serve them with your favorite dipping sauces, such as ketchup, mayo, mustard, barbecue sauce, or cheese sauce. Enjoy!