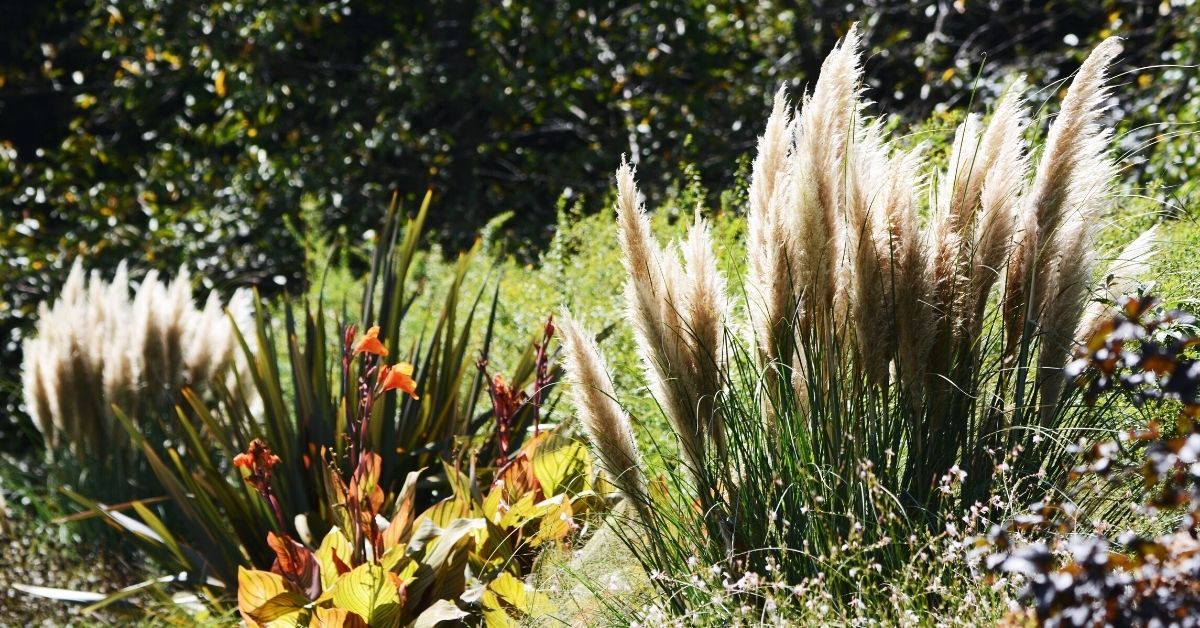
Lasagna gardening is a no-dig, no-till organic gardening technique that produces rich, fluffy soil with minimal effort on the part of the planter. Your plants will thrive in a lasagna bed because the soil is filled with microorganisms.
This information will be useful to gardeners all around the world. Increased harvests, fewer weeds, and fewer pests will be the results.
All you need to finish this project is the ability to bend and use a shovel.
The term “lasagna gardening” has nothing to do with the plants you’ll be planting. It refers to the process of constructing the garden, which entails layering organic components that will “cook down” over time, resulting in healthy, alive soil. The best time to start this garden is in the fall, when it will have plenty of time to break down during the winter.
The tools you will need for Lasagna gardening:
Grass clippings, leaves, fruit and vegetable scraps, coffee grounds, tea leaves, and tea bags are all items you’ll need. Weeds (which haven’t yet gone to seed) Compost, Manure, and Seaweed Newspaper shredded or garbage mail needles of pine, Garden trimmings, squandered blossoms Cardboard, peat moss.
Alternative names for Lasagna gardening:
Layer Composting, Layer gardening, Sheet Composting, and Lasagna Composting are all terms used to describe Lasagna Gardening. Whatever you want to call it, it all boils down to the same thing.
Other tiny gardening concepts, such as Raised Bed Gardening or Container Gardening, can be utilized alongside or in conjunction with it. It may also be utilized in any part of the garden that receives enough sunlight for plants to develop.
Does Lasagna gardening really work?
Although some may say it is a novel notion, it is actually a modernized version of an ancient concept that has been employed under many titles or descriptions since ancient times.
However, the term ‘Lasagna Gardening,’ like the others listed, dates from the late 1800s to the present day.
A Lasagna garden is essentially a stacked garbage heap filled with organic material, either by chance or purpose. For example, this was referred to as a Midden by the ancient Scots. A location where all food waste and animal feces would be disposed of.
It was probably discovered that some of the discarded vegetables took root and thrived in these circumstances, and the Midden was soon utilized to raise vegetable harvests.
Alternative no-dig, no-till gardening methods
Growing veggies in Straw Bales, Raised Beds, and Containers of various shapes and sizes are all examples of No-Dig gardening (a generic phrase for gardening that does not require heavy digging).
The ‘increase’ in interest can be linked to a variety of factors, including convenience, a desire to produce organic, nutritious food, a lack of garden area, and so on.
When you add in the fact that many ‘celebrity’ gardeners are now advocating this way of vegetable growing through the media and the internet, you have a rising movement of enthusiastic gardeners.
This is not ‘fad’ gardening, to be clear. It is well suited to the time we live in. It has numerous advantages over typical vegetable growing, and some would say that it is the finest and most prolific example of recycling.
Are you ready to grow incredible vegetables without the time-consuming digging and upkeep of a typical garden? Then keep reading to discover a slew of reasons why you should give it a shot.
Advantages Of Lasagna Gardening
- No Digging Is Necessary: This is the most common type of no-till gardening. The materials are tossed into a stacked mound, and the seedling or seeds are planted in a pile.
- Immediate planting: You may start planting your lasagna garden right after it’s built, or you can wait until spring. Your top layer should be 4-6 inches of compost if you want to plant it straight away.
- A fantastic utilization of unproductive land: If you are ‘fortunate’ with hard Stoney or otherwise poor soil on which to grow anything, this approach may be exactly what you need! The material is not turned over at all, and the only digging necessary is to put your seedlings in a little hole dug by hand.
- Improves soil quality: The act of building on grass enhances your garden’s soil quality, and you may add more levels as needed. If you’re developing in an area with low soil quality or clay soils, a lasagna garden will provide a healthy top layer of free-draining soil on top of heavy, difficult-to-work soils like clay.
- Protects soil structure: Beneficial microorganisms, fungi, and earthworms are all protected by it. It also stirs up weed seeds, which can make weeding more difficult later in the season. Finally, plowing and tilling can cause soil erosion when accompanied by even modest rain events.
- Fertilizers are not required: The nutrient-rich growth media is created as the stacked heap decomposes. This saves you money and time since the plants have all of the nutrients they require to grow. This is mostly due to the fact that you are utilizing a “clean” growth medium rather than weed-seed-infested dirt. Weeds will ultimately find their way into your lasagna garden heap, but they’ll be easy to take out of the soft composting material.
- No Weeding: The lasagna garden does not require weeding for the first few months of use. It also means that you can raise chemical-free, organic foods for your family!
- Excellent Recycling: This is a fantastic technique to recycle any old organic waste and turn it into fresh veggies! Newspapers, cardboard cartons, and kitchen garbage, for example, may all be recycled. All of these ingredients may be gathered and utilized to start your lasagna vegetable garden. (More useful materials will be discussed in later chapters.)
The layered garden may be set up on any surface, including concrete. To make a super-productive vegetable bed, just map out your space (more on this later) and pile on your resources.
Disadvantages of Lasagna Gardening
Even from a sustainable and organic standpoint, there are drawbacks to lasagna gardening. Lasagna gardening is also known as no-till gardening, which is a strategy recommended for lowering carbon emissions. However, this is also one of the primary arguments against lasagna gardening – which is why it’s essential to examine the ‘pros’ and ‘cons’ of lasagna gardening in detail.
Because aerobic bacteria cannot operate efficiently in the absence of oxygen, the decomposition process is slowed, and many released nutrients from the decaying down are less likely to be absorbed into the soil and instead drain away in rainfall run-off – especially if placed on top of clay soils.
Other petroleum compounds, pollutants, and heavy metals may also be spilled, contaminating a vegetable patch. As a result, we advise you to be very picky about what you choose as a foundation layer.
Slow nutrient return and soil oxygen content: As the heavier lasagna garden layers decompose, oxygen levels in the soil can be lowered because the various layers of material – particularly the moist cardboard and newspaper – effectively smother them.
Choosing safe materials: Many of our cardboard boxes are imported from other countries, where there is no regulation prohibiting the use of certain chemical colors in the box production process. Many shiny cardboard surfaces are also varnished with polymers and plastics or, worse, are heat-set with true plastic finishes. These should be avoided since they can discharge microplastics, which can be devoured by wildlife and our plants.
Time Benefits: One of the lasagna garden’s touted benefits might also be a disadvantage. The time it takes to collect and transport all of the organic material required for carbon/nitrogen stacking is added to the time it takes for the layers to decompose into accessible nutrients. It may work – and it may appear that something was accomplished quickly – but lasagna gardening takes time to reach its peak productivity.
A lasagna garden’s functional size is limited: it would be impractical to try to do a whole field in this manner; hence this is more of a small-scale option for urban farming. For bigger food production areas, gathering enough food-safe paper and cardboard for layering would need a determined effort.
How do you make a lasagna garden?
Let’s dive into building a lasagna garden to start immediate planting.
Step 1: Locate an appropriate spot for lasagna gardening
You do not need to be concerned about the appropriateness of the ground for growing your veggies. This means that there are really just two key elements to consider when it comes to actual growing: water supply and natural lighting.
Depending on your environment, you may have to consider rabbits, deer, or other species that enjoy eating fresh veggies as prey. You may even have to consider the possibility of theft or vandalism.
Sun, water, and nutrients are the most important elements when it comes to a plant’s demands. As the heap decomposes, the nutrients are taken care of, with the potential of a ‘top-up’ with organic fertilizer or tea.
Make sure you’re close to a water source, as manhandling liters of water to keep your vegetables from going bad may be a real pain!
Most veggies require at least 8 hours of direct sunshine to thrive, so choose a location in the yard that is not too shady for your specific crops.
You should also avoid planting your lasagna garden near overhanging branches or dense vegetation. This will not only deprive your plants of sunlight, but it may also cause illness or insect infestation (particularly aphids) among your crops.
Step 2: Gather your supplies
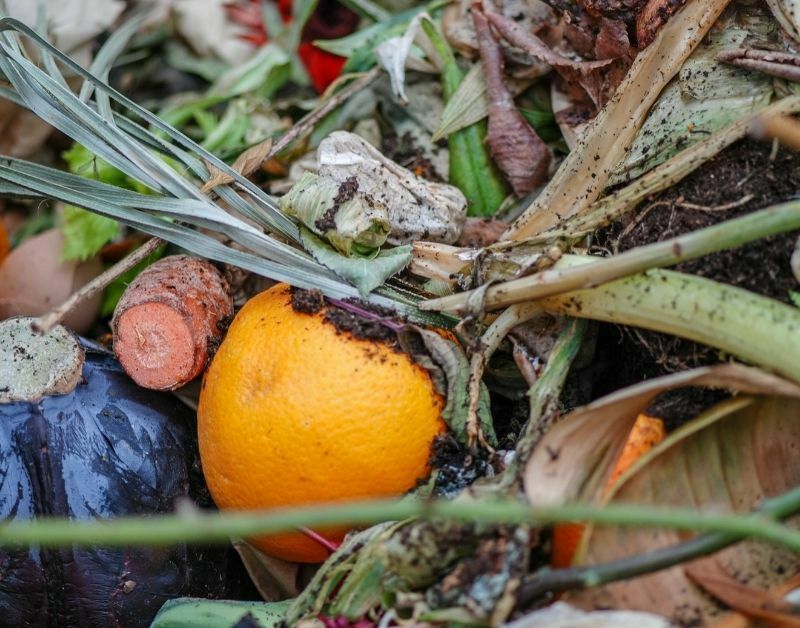
What should your lasagna garden contain? Basically, anything you would put on your compost heap may be used to make a lasagna garden.
This is a brief list of things to add to a compost pile or lasagna garden.
(Dried Matter) Carbon: Dry leaves, straw, wood chips, sawdust, dried grass, straw, cardboard, uncolored paper, and little twigs
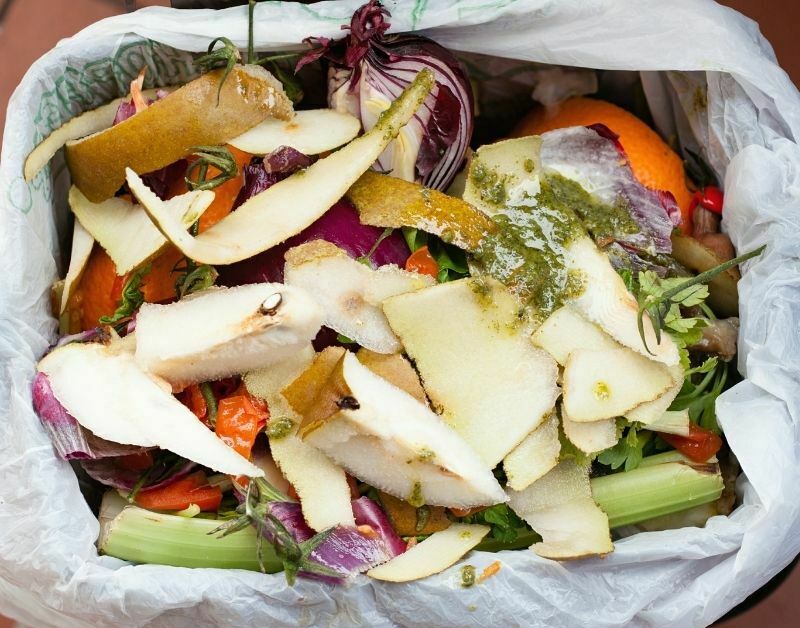
Fruit and vegetable leftovers, yard clippings, weeds, plant cuttings, animal dung (herbivores only), and old flowers are all nitrogen sources (green matter).
For several reasons, you should not add the following materials to your compost:
Plastic, polythene, polystyrene, and other inorganic materials This should go without saying because neither of these items disintegrates – but it must be stated:)
Dog or cat feces should never be introduced to the compost heap because they can introduce disease organisms and larvae to the mix.
Fat, fish, meat, bones, and dairy products should not be introduced since rats and mice would be attracted to them. They will also decompose rather than disintegrate, resulting in a foul odor in your compost.
Coal ash includes a lot of sulfur, which is detrimental for most plants, whereas lumber ash contains a lot of potash, which is helpful for fruiting plants in particular.
Colored paper: Glossy magazine paper, as well as any other colored paper, should be avoided since the colors include numerous dangerous or poisonous substances.
Plants that are unhealthy should never be added to the layers since they are likely to transfer the illness to your new crops. If at all feasible, dispose of them by burning them.
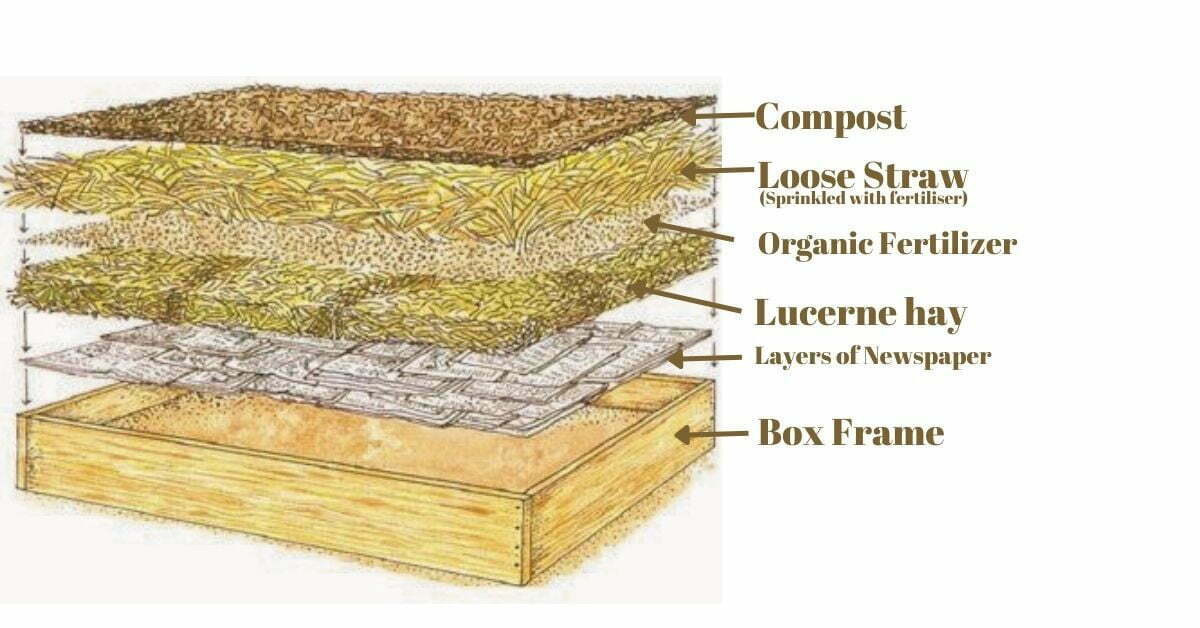
Lasagna gardening layers
It’s time to layer your lasagna garden once you’ve gathered a sufficient amount of material — it should ideally be enough to build a mound 18-24 inches deep.
Step 3: Putting the materials together:
Once you’ve gathered all of your supplies, separate them into two categories: browns and greens.
This is how it all works. The ‘brown’ material adds carbon to the heap while also allowing for ventilation or aeration. The ‘green’ substance provides all of the necessary nutrients, like nitrogen and potassium.
The more ‘green’ stuff you have, the faster the heap decomposes and, consequently, the hotter it becomes. Hot Bed Gardening, an early-season gardening approach, is based on this basic idea.
It’s best to use use a combination of 3-4 parts ‘brown’ material to 1 part ‘green’ material to produce the lasagna compost. This prolongs the composting process and ensures consistent results throughout the growing season.
The dirt layer in the figure above is optional, as discussed in the following chapter.
Grey color = paper or cardboard (avoid glossy magazines or colors with a lot of contrast).
Green = Nitrogen-rich organic vegetation such as grass clippings, kitchen trash, manure, fruit, and so on.
Wood shavings, sawdust, little twigs/branches, and shredded newspaper are examples of light brown materials.
A 3-inch layer of compost or dirt = dark brown.
Start by soaking a few sheets of newspaper (5-10) or a layer of cardboard before putting together the lasagna system.
The paper/cardboard will stop the growth in its tracks, so it may be spread straight over grass, weeds, or anything else.
A lasagna garden is not dependent on the surrounding soil in any manner. However, constructing it out of concrete eliminates the natural composting process, which relies heavily on microorganisms and worms in the soil.
Yes, it will continue to operate while nature takes its course, but for the greatest effects, it should be placed on soil or even a gravel bed.
Stack a thick layer of brown material on top of this layer of paper, then your green material, and finally your brown material. More paper or cardboard is then stacked on top of it.
Repeat this method until you have a tiered bed that is at least 18 inches deep (watering as needed). Finish with a final layer of paper or cardboard on top of the bed.
Alternatively, if you want to start growing vegetables right away, top up the heap with 2-3 inches of excellent topsoil or, better yet, a suitable growth medium like a compost/peat/sand mix at 1/3 each if you want to start growing vegetables right away.
So, what’s next?
There are a few options available to you at this stage, depending on your specific circumstances.
If it’s the first day of the growing season for you, you may start planting right away by topping up the mound with topsoil. To get your plants started, just dig a tiny pot-sized hole in the top layer and fill it with dirt.
If it’s later in the season and you need to wait a few months before starting, you have two options: either walk away and let the whole mix decay or cover it with a tarp and wait until spring. This will hasten the breakdown process and give the worms and microorganisms more room to work.
Can you start a lasagna garden in the spring?
Yes. In the spring, remove the tarp and plant your vegetables! (In the spring or summer, you may need to add peat or topsoil to construct a lasagna garden. This allows you to start working on your garden straight immediately. If you’re making the bed in the spring, layer as many greens and browns as you can, with peat or dirt thrown in for good measure.)
Keep in mind that the level will drop dramatically over the next few weeks/months as the heap decomposes. This is to be expected, and it’s simply an indication that the composting process is progressing as planned.
How to get rid of the mess?
It might appear to be a jumbled mess, but there are at least three simple fixes if you want your veggie plot to be clean – and don’t mind putting in a little more effort.
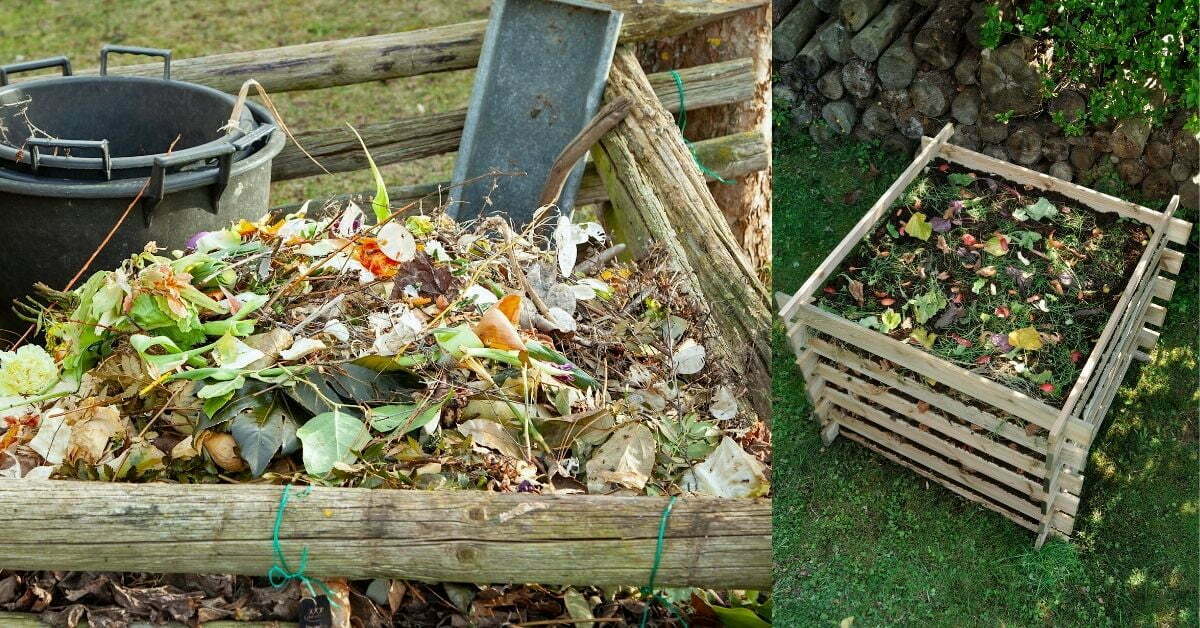
The first way is to simply build a wooden frame or box, similar to a Raised Bed garden, and fill it with the lasagna composting process mentioned above.
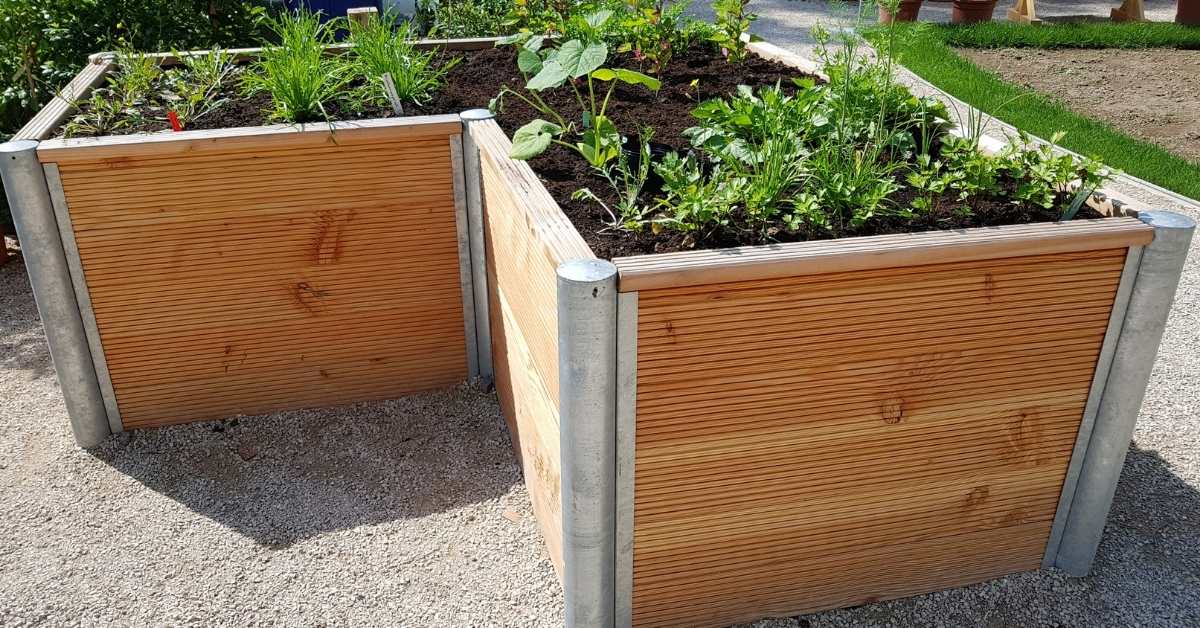
The image above shows an example of a 2-foot-high Raised Bed, which is easier on the ‘old back’ because there isn’t much bending over required!
This box can be fashioned out of a variety of materials; anything that can hold the ‘mess’ inside will suffice. Even chicken mesh can be utilized to keep the infill contained. In fact, this strategy aids in the composting process by allowing air into the heap.
Although the Raised Bed shown above is huge, you may customize it to fit your needs — or your material supply!
The ‘trench type‘ lasagna garden is another way that requires more physical effort but is less expensive to execute.
This entails excavating a hole or trench to the required proportions. Fill in the organic material in the same manner as previously instructed until it is about 4 inches above ground level.
Add topsoil or growth mix until it is 2-3 inches higher than the surrounding ground level. As decomposition occurs, this will somewhat compensate for the sinking impact. The pit may be topped up at the end of the season to bring it back up to par with the rest of the veggie patch.
Another approach is to combine the first two approaches. Instead of creating a trench that is 18-24 inches deep – which may be a lot of labor – make up the difference by constructing a shallow pit that is just 6-12 inches deep and surrounding it with a wooden frame.
For example, a 6-inch deep pit will require a 12-18 inch frame on top to build up a minimum of 18 inches of composting material.
A semi-sunken pit for lasagna gardening is seen in the diagram above. You might also consider creating a sump at the bottom of the pit and filling it with loose stones or crushed gravel to function as a drain, especially if you have water-logged or soggy land.
In the end, there isn’t much you can do ‘wrong’ when it comes to creating a lasagna garden. Simply combine a decent mix of brown and green materials and stack them in a way similar to that mentioned, and you’ll have a nutrient-rich bed in which to grow your vegetables.
This approach may be used to fill containers of all shapes and sizes, as long as they are large enough to hold numerous layers of organic materials.
Lasagna Garden Planting Guide
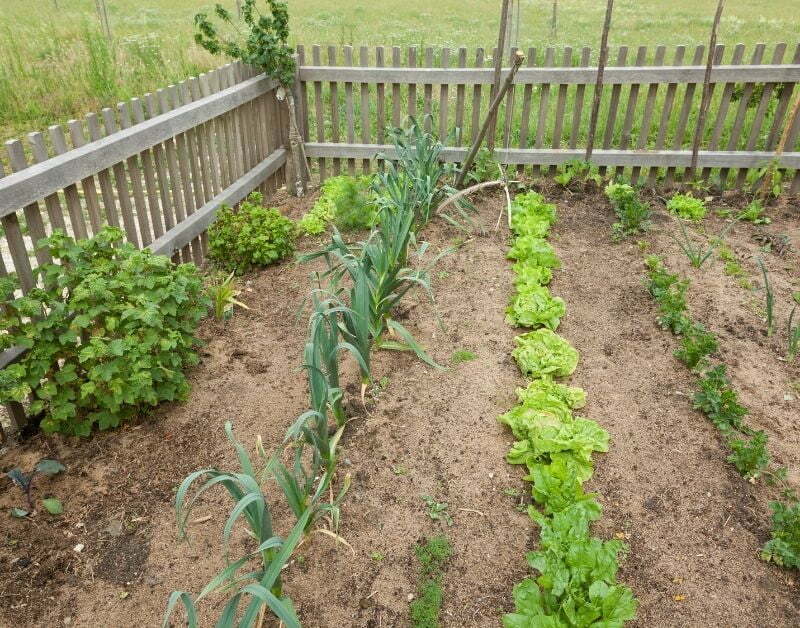
So, what can you plant in a lasagna garden, exactly? The answer is simple: almost anything that can be grown in a conventional garden!
For example, if you are planting directly into the top of the heap with no soil covering, I would not recommend growing deep-rooted vegetables like carrots or parsnips — at least not until the heap has broken down for several months.
This is because the roots will be obstructed by the cardboard or other brown material right away. This will cause the root to branch out in different directions, similar to what would happen if you planted it in Stoney soil.
This weird look may be prevented by either waiting a few months (construct it in late Autumn and plant it out in the spring) for the material to break down, allowing the passage of the safe root,’ or utilizing the following approach.
Cut down at least 6 inches into the top of the heap using a garden knife or sharp spade, then slide the spade from side to side to produce a ‘V-shaped channel in the mound.
Before scattering a thin row of seed along with it, fill it in with a nice compost mix. This will provide the ideal growing environment for your carrots, resulting in robust, straight roots.
This is the same strategy you’d use in a Straw Bale vegetable garden to grow carrots or parsnips, and it’s highly successful.
The Top 10 Vegetables To Grow In Lasagna Gardens
There are hundreds of veggies you can grow yourself, depending on your region, whether you want to grow outside or in a greenhouse, and even what you enjoy or want to cultivate.
However, for those who are new to vegetable gardening, here are my top 10 vegetables to try out and get a feel for producing your own own.
Although this guidance is intended to be used as a general reference for planting vegetables in a ‘regular’ garden, it should be noted that vegetables produced in a lasagna garden can be put closer together than usual.
- Because the growth medium is nutrient-rich, the plants are not competing for nutrients with their neighbors.
- Because weeds aren’t as prevalent in this gardening method, you don’t need to leave enough room for a garden hoe to pass through.
- As stated in point 1, the vegetables are not fighting for nutrients and water with weeds. With that in mind, here is a list of ten common crops to cultivate in your own backyard vegetable garden.
1. Cucumber:
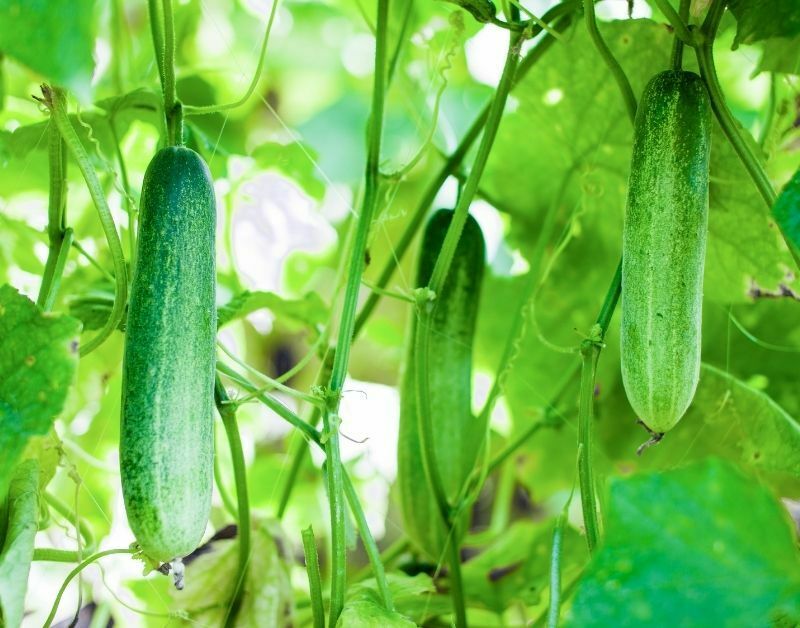
This favorite salad vegetable is a fast-growing climbing plant that thrives in hot weather. If properly cared for, each plant will produce a large number of fresh cucumbers throughout the growing season.
Planting cucumber:
The cucumber requires full light and can be grown as a ground plant or as a climbing plant climbing up a trellis or garden net; thus, you must determine how you want it to grow before planting.
If starting from seed, start inside in a warm environment (65 degrees is required for germination) and wait at least two weeks after the last frost to transplant outside.
Seeds should be placed in rows 6 inches apart and 1 inch deep. Plant the tiny seedlings around 12-18 inches apart once they are ready to be transplanted.
Cucumbers are vulnerable to frost, so I’d have a fleece covering available for the first week or two after planting to protect them.
Cucumbers like a pH of approximately 7 in neutral or slightly alkaline soil. A good crop may be grown in compost with a lot of well-rotted manure and other organic material.
Cucumber Plant Care:
If your cucumbers are on the ground, cover them with a covering or straw to shield them from the moist soil and to function as a mulch to keep them from drying out. Hanging Cucumbers may need to be supported on the vine to avoid plant damage.
Cucumbers require frequent watering to avoid developing a tiny, bitter plant. They, like other vegetables, will not accept being over-watered. To avoid this, stick your finger into the soil beyond the first joint, and if it is dry beyond that, water is required.
Cucumber harvesting:
Harvesting your cucumbers on a regular basis will provide a steady supply of fresh cucumbers. Harvest when they grow 6 inches and above to ensure a good crop; if you want to pickle them, approximately 2 inches is perfect.
Continue plucking them as they develop on the vine because if you don’t, the plant will stop producing, and the ones that remain will turn tough and slightly bitter.
Cucumbers should be kept firmly wrapped in plastic film since they are 90% water. If stored in a cool area, they will survive at least 7-10 days in this state.
3 or 4 of these heads will have developed into little cabbages in just a few weeks.
To preserve your cabbage head, make sure it is dry to the touch before wrapping it in cling film and keeping it in a cold area for no more than two weeks.
2. Cabbage
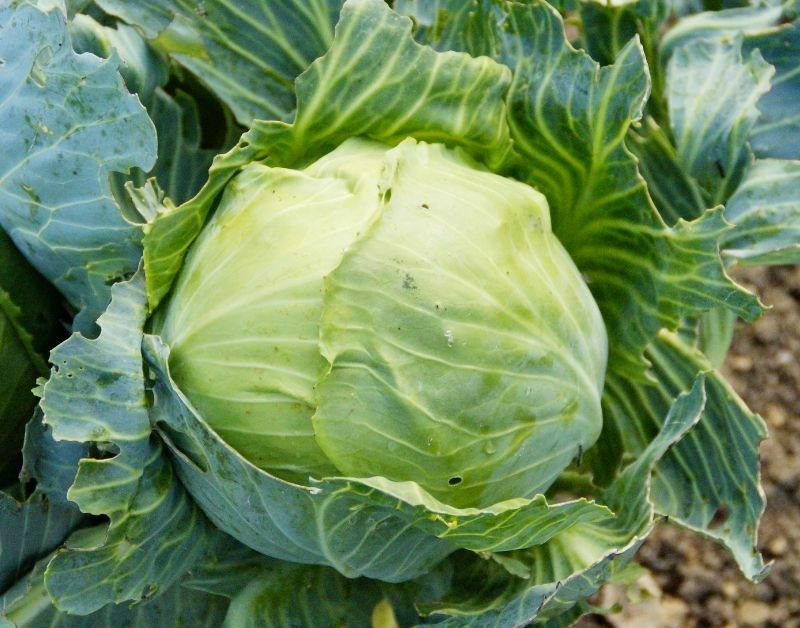
Cabbage is a popular vegetable that comes in various types, allowing for a wide range of growing circumstances and flavor preferences. It prefers mild temperatures and is rich in iron, making it perfect for cooler Northern regions, where it is best planted in the early spring and fall.
Planting: Begin planting seeds inside approximately eight weeks before the final spring frost to get a head start on the season. After that, transplant the young plants into your prepared space around two weeks before the last spring frost.
Protect the seedlings with a cloche or some garden fleece at this period, especially on chilly evenings, until they are properly established and the cooler season has passed.
Cabbage Plant Care:
Young plants, in particular, must be safeguarded from pigeons and rabbits, who may quickly kill your plants if left unattended! Garden fleece works well in this situation, especially against pigeons and cabbage butterflies. However, more strong measures, such as rabbit netting, may be required to combat rabbits.
Cabbage caterpillars, as well as aphids and other insects, all enjoy a bite of cabbage! To learn how to keep them out of your cabbage patch, go to the section on Organic Pest Control.
Harvesting: When the cabbage has developed a sufficiently solid head, it is ready to be harvested, which normally takes around 65 days. Remove the mature cabbage by cutting it off at the base of the head, but leave the stalk and outer leaves in place. After that, the plant will send up new branches to develop new heads.
3. Bell Paper
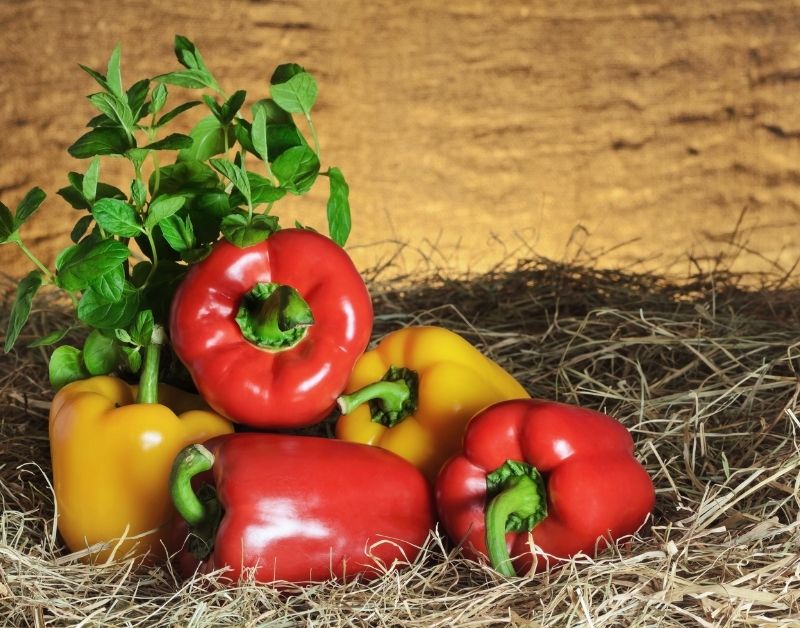
Peppers are second only to tomatoes as a garden favorite, and they come in a variety of forms, colors, and sizes, as well as spicy and sweet varieties, and modern cooks would be lost without them! If you have warm enough circumstances, this is a straightforward plant to cultivate (average 70 degrees F.) Bell peppers are a terrific addition to your greenhouse or food garden.
Planting peppers:
Peppers will not thrive in temperatures below 65 degrees Fahrenheit on the ground. If you wish to grow them outside, this is the very minimum; in colder areas, it’s ideal for growing them in a greenhouse.
Seeds should be grown about 3-4 to a pot and the weakest discarded before transplanting the healthy plants to your outdoor growing area (if you are able to grow them outdoors) after the spring frosts are well clear.
They should be planted about 18 inches apart, in rows about two feet apart. Placing a cardboard collar (try the toilet roll insert when the paper is finished!) around the stem of the plant, sunk about an inch into the soil, will protect against stem cutworms.
They are particularly susceptible to root shock if the ground temperature is below 60 degrees F. This can stunt the growth for several weeks, so they must be considered before planting out. Peppers have to be supported with canes or some other support such as nylon garden mesh.
Plant Care:
Because this plant is thirsty, it should be watered on a regular basis, especially if you live in a particularly hot and dry region. Ascertain if the fruits are well-supported and the plant is not suffering from the weight.
Weeding around the base of the plants must be done with caution, as this can quickly destroy the shallow root system. Keep an eye out for aphids and flea beetles, as well as blossom-end rot, which happens when calcium levels are low, generally due to inadequate or inconsistent watering.
If there is stagnant water around the stem, they are more prone to root rot. Thus, excellent drainage is vital for a healthy plant.
Harvesting: Unlike some other vegetables that become harder as they age on the vine, peppers become sweeter and more flavorful as they mature, and their vitamin C level increases.
Remove the peppers by snipping the pepper stem from the plant rather than injuring or breaking it. Peppers may be stored in a plastic bag in the fridge for 7-10 days or sliced and frozen.
4. Beets
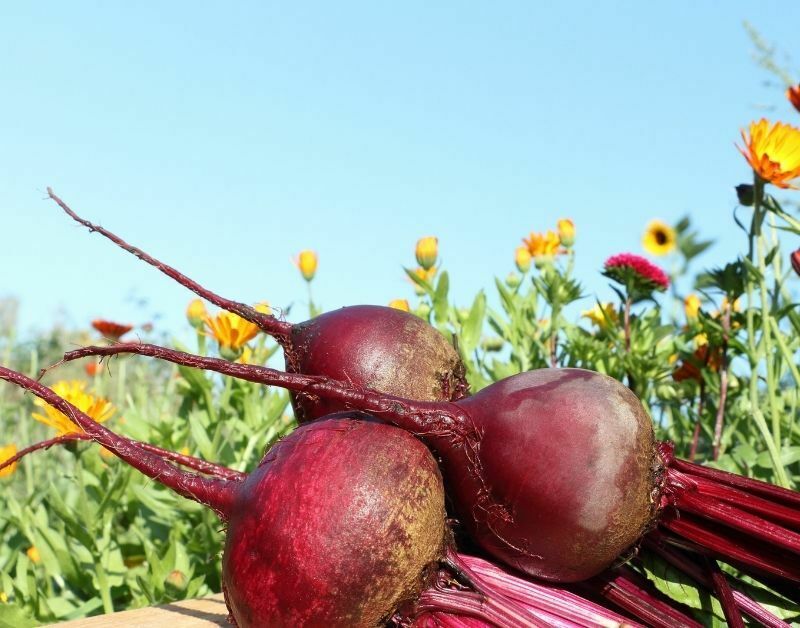
Beets are a fantastic choice for Northern gardeners since they thrive in milder climes. They make a great long-season crop since they can withstand cold. Will thrive in high phosphorus environments; however, high nitrogen levels may cause excessive leafiness and undersized bulbs. As a result, it’s not a good idea to plant it in the same spot that legumes like peas and beans have recently gone.
Planting beets:
Seeds can be sown inside to get a head start, about 1-2 inches apart and 12 inches deep, but if planting outdoors, wait until the soil reaches 50 degrees.
Planting can begin in late March/April if the weather permits and continue until the end of the season. Plantings should be spaced 20 days apart to ensure Beets are available throughout the growing season.
In zones 9 and above, this is a promising crop for late-season And even winter harvests.
Beet Plant Care:
When the plants reach approximately 2 inches in height, thin them out by pinching them off at the base or snipping them with scissors to avoid disturbing the earth. Leave a 3 to 4-inch space between plants. Because beets are prone to rising out of the ground in their early stages of growth, making them vulnerable to slugs and other insects, it’s best to gently press the baby beets back into the bed until the root system has established itself.
Beets can be picked around 50-70 days after the bulb develops, but they can be harvested at any time after that. They may be kept for extended periods, but they will get more complicated and slightly woody as they mature.
The leaves of the beetroot plant are a highly nutritious and edible portion of the plant; they are also delicious and make a fantastic complement to salad meals if plucked before they get old and tough.
Beets may be preserved for months if kept in a dry, cold, and dry environment. Remove any dirt from the beets after lifting them and allow the skins to dry before storing them. To preserve beets, they can be pickled, frozen, or canned.
5. Runner Beans:
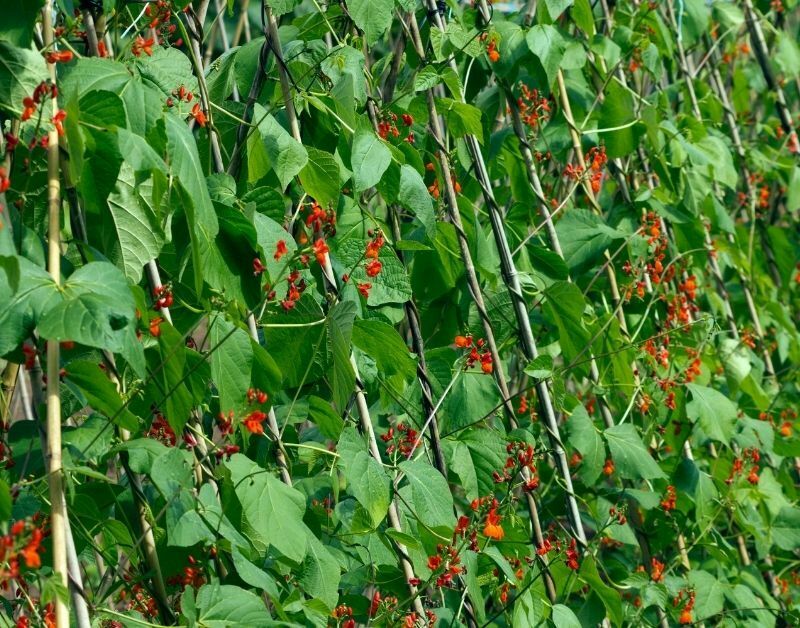
Growing runner beans (Phaseolus coccineus) is one of my favorite things to do in the food garden. I’m excited about runner beans since I’m impatient by nature and can’t wait for them to grow. The runner beans come very helpful here because they grow so quickly!
As soon as you put the frame up, they start reaching for the stars and producing delicious beans. There are a few measures to take while planting runner beans, or any other plant for that matter, in order to receive the greatest results.
Runner beans appreciate loamy soil with a decent compost mix, but they are a forgiving plant that will thrive in a variety of soil types. Beans require less fertilizer than most other plants because they collect nitrogen from the air and deposit it in the soil. This capacity to deposit important nitrogen for other plants is why they are employed in companion planting strategies.
If feasible, plant in full sun; however, little shadow will suffice. They should be maintained out of the wind because they are susceptible to wind damage if overexposed.
When to plant beans: Runner beans should be planted after the season’s last frost, as they are particularly vulnerable to frost damage. It’s preferable to start from seed in a cold frame or greenhouse and then transplant the seedlings into the garden. If there is a risk of a late frost, it is best to cover them with a light fleece at night to keep them warm.
Preparing for runner bean planting:
It’s ideal for constructing the framework that will support your runner beans while they develop before you plant them. This is usually done with a wigwam-style frame, which is made up of numerous canes connected at the top and bound together with twine.
The runner beans are then trained to climb the canes and secure themselves as they do so. Peas, on the other hand, will cling to the plant’s tendrils to keep themselves secure.
If you’re planting seedlings, take them out of the pot when they’re well-rooted but not pot-bound. Dig a hole large enough for the plug with a small trowel, then set the plant in the hole, firming the dirt around the base.
Planting beneath a cloche for the first few weeks of growth will shield them from frost and provide a boost when the soil heats up.
This will help keep the birds away from your young plants. If a young bean crop is not covered, pigeons, in particular, can do a lot of harm. Cutting the bottom of a plastic coke bottle and placing it over the plant is another approach to preserve the young plants (make sure you remove the top ). Naturally, if you already have your canes, this approach becomes a little more challenging, so prepare ahead.
Rodents adore nibbling on a scrumptious bean! Keep an eye out for them, and if they become a problem, cover them with fleece to divert the mice during their early stages of development. Many a bean crop has been ruined by mice digging up the bean before it has even begun to sprout!
How to Care for Runner Beans:
Runner beans, in general, require very little attention during the growing season. When blossoming begins, give the plant plenty of water to stimulate development. Nip out the developing tips of bushier bean plants when they reach the appropriate height.
Keep an eye out for aphids, often known as caterpillars, and take action as soon as you notice them. Aphids may quickly outgrow their control and cause a variety of plant diseases, as well as infect your beans with a sticky mess!
Harvesting your Runner Beans:
All bean harvests should be picked when they are still young and tiny since they can become harsh and fibrous as they mature. They’re also best eaten right away or blanched and frozen within the first few hours of picking to lock in the greatest flavor.
Even if you don’t need the beans, keep picking them on a regular basis. This promotes the development and assures a consistent supply of delicious, fresh runner beans for the table. Beans can also be preserved and kept throughout the winter for use in stews and casseroles.
Garden peas should be planted using the same general guidelines.
6. Growing Leeks
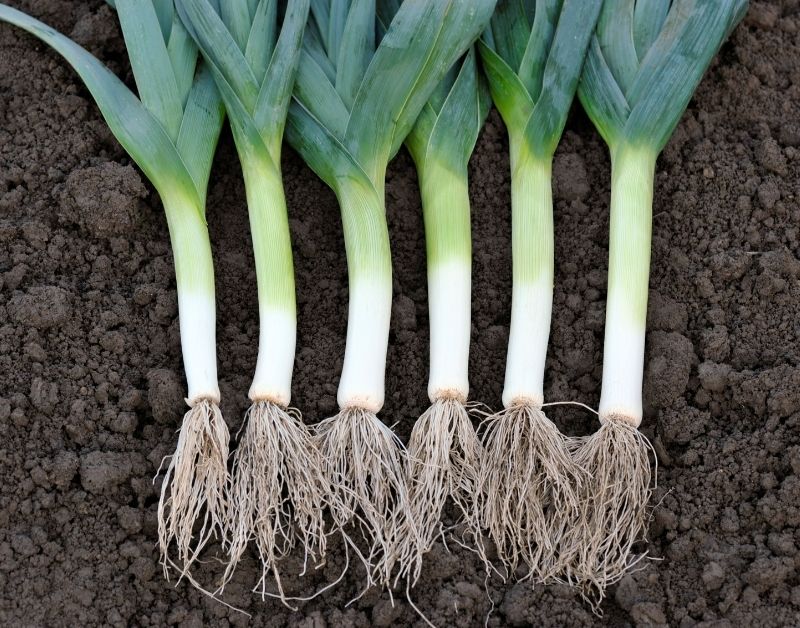
Knowing how to cultivate leeks is vital for the vegetable grower. Leeks are perhaps one of the most sought-after vegetables for the kitchen table, a perfect choice for lasagna gardening.
The leek is a fantastic addition to the ordinary diet since it produces a beautiful long white bulb as well as green leaves that can be used to flavor casseroles and soups, as well as many other recipes. It is high in vitamin A and, therefore, a perfect addition to the typical diet.
The leek, like the Thistle in Scotland, the Rose in England, and the Shamrock in Ireland, is the national symbol of Wales. As a result, it is a well-known vegetable, particularly in the United Kingdom.
Along with the decision to produce leeks, you must also decide whether to grow them from seedlings or from seed. This is in addition to the type of leeks you want to produce, as well as the ground conditions and other factors that are required for successful production.
Ground conditions:
Leeks will grow in a broad range of soil conditions, but there are certain guidelines to follow in order to develop a strong, robust crop of top leeks – as with other plants, of course.
To begin, it should be remembered that the only type of land in which leeks do not grow in swampy ground. The first step in producing leeks is to choose a healthy, well-drained spot to sow your seeds or seedlings.
Second, if feasible, leeks should be planted on land that has been thoroughly manured the previous year to yield the finest harvest. The reason for this is because planting leeks on newly manured soil results in a highly green crop that may be extremely harsh and stringy. If you need to add organic matter to the soil before planting your leeks, well-rotted compost is great.
If you are sowing leeks from seed, they should be sown extremely thinly, approximately 1 inch (25mm) each, in drills spaced about 6 inches (150mm) apart.
Plant approximately 1/4 inch below the surface and cover gently. Sowing should take place in early spring, around April. If you’re sowing directly into the seed bed, covering them with a cloche for the first three weeks or so can boost early development while also protecting them from a spring frost.
The leeks should have germinated after two to three weeks. The next step is to thin out the leek plants as quickly as possible, spacing them about two inches apart.
Early in the summer, when the plants are approximately 8 inches tall, they are ready to be planted in their permanent placements if they are not already there. They must now be thinned down to around 10 inches apart in any event.
When replanting your seedlings, dig a hole 6 inches deep by two inches broad with a dibber or a pointed stick. Trim the roots of your leek plant to around one inch long (25mm) and just a bit of the top of the leaves. Fill the holes with water once you’ve inserted the leeks. This will help the plant establish itself faster by washing the dirt at the base of the roots. Fill up the space surrounding the young plant with dirt.
Here’s how to cultivate leeks:
Another option for growing leeks is to dig a trench in the planting area approximately 1 foot deep (250mm) and fill it with about three inches of well-rotted manure. About 6 inches of dirt should cover the manure.
Plant the leeks as directed above, making sure they are hard around the edges and absolutely erect. Plant at a distance of 10 inches. If you need more than one trench, dig them approximately two feet (600mm) apart to avoid the sidewalls collapsing during the process.
Taking Care of Your Leeks:
During the growth season, the leeks just require light hoeing between them to ensure that weeds are kept under control. This aids in the loosening of the soil, which aids in moisture retention. Blanching is another characteristic of leeks.
This is a method for keeping a good length of white soft edible leek at the plant’s stem, rather than allowing everything to turn to leaf. One approach to achieve this is to raise the dirt around the leek as it grows, similar to how the drills around young plants in a potato crop can be lifted to stimulate tuber growth while also preventing the potatoes from getting exposed to the sun.
Blanching your leeks has the disadvantage of allowing them to rot, especially if the soil is unusually damp. This may be avoided by equipping your leeks with a collar. This is basically a tube with a diameter of 3 inches and a length of up to 12 inches. At or around the conclusion of the growing season, generally around mid to late August, depending on the temperature, push the collar into the soft dirt surrounding your leeks.
The collar in the image above is made of plastic tubing to avoid nibbling mice! It may, however, be created out of nearly anything, including brown paper fastened on with elastic bands.
After that, the earth is stacked up against the plant in the manner stated. Following these measures will help guarantee that your leek crop, which should be ready from late August to late March, is in top shape and ready to use!
This variety of leek, which has a long white tuber, creates a fantastic ‘leeks in cheese sauce’ meal, which is one of my favorites.
Harvesting:
Do this as and when you need them, leaving them in the ground until they’re needed. Instead of plucking the leeks from the ground, dig them out with a garden fork since this will leave you with nothing but a handful of leaves! If you must harvest them all, put them in a cold box of sand or in a cool trench off to the side of the plot if you need them for the next harvest. Cover the roots lightly with dirt and harvest as necessary.
Leek bulbs:
Leek bulbs are a useful by-product of leeks that have been kept till the next summer. If the leak has gone to bloom, just snip off the flower stalks to acquire a beautiful summer harvest of leek bulbs at the plant’s stem. These can be used in casseroles, stews, and other dishes such as onions or shallots.
7. Carrots
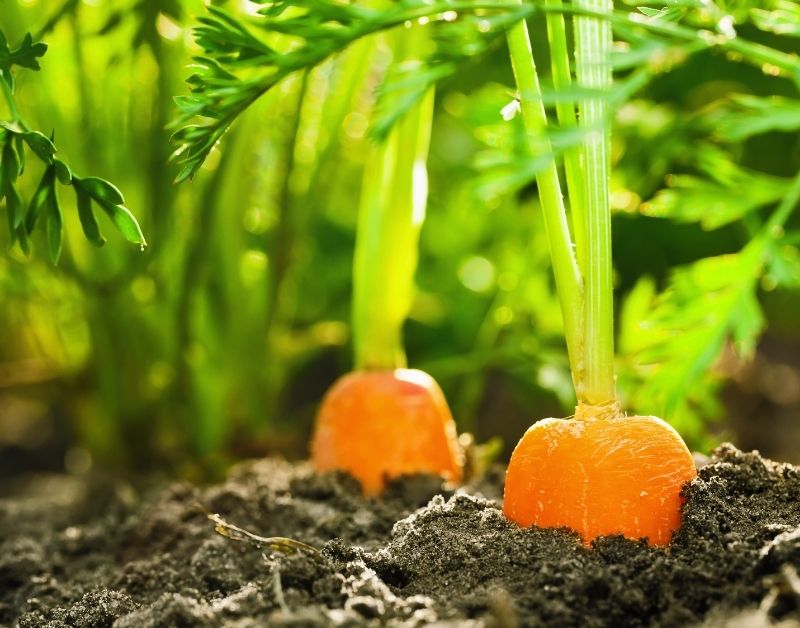
Knowing how to grow carrots properly, like with any food, may save a lot of anguish and heartache when it comes time to harvest. The carrot fly is a pest that attacks carrots in particular (Chamaepsila rosae).
This damaging bug has been known to damage parsnips and celery, so keep an eye out for it. Aside from that, growing carrots is not difficult, provided specific preparations are taken to ensure a robust harvest of tasty fresh carrots for the table.
Carrots, like onions, are a chef’s favorite because they can be used in so many various recipes. They are considered a “must-have” vegetable in all top restaurant kitchens. Carrots are wonderful cooked, boiled, or even grilled with a honey and orange sauce since they are high in vitamin A and calcium.
Carrots require light sandy soil and a location where they can get the most of the day’s sun; however, they can tolerate a little shade, especially in hotter areas. If you want to avoid the ‘clubbing’ effect, which causes the carrots to grow all twisted and miss-shaped, you must grow them on soil that is free of stones.
As a result, I always like to grow carrots on a raised bed, where the soil can be better regulated to make a light sandy soil free of stones, which the growing carrots enjoy.
Planting seed:
After the soil or growth medium has been prepared, the carrot seed may be planted. This is a basic procedure that entails forming a shallow groove in the soil and sparsely scattering carrot seeds along the channel. After that, the seed is softly covered with dirt. To stimulate growth, cover them with a plastic cloche if planted before late March.
The approximate spacing between rows is 6 inches. After the carrots had germinated and grown to a height of 2-3 inches, I would begin to thin out the seedlings to approximately 4 inches apart. To prevent the dreaded carrot fly, proceed with caution, inflicting as little disruption to the surviving plants as possible. Trim the leaves of the seedlings you don’t want slightly below the surface using a sharp knife.
To avoid the carrot fly, remove any leftover foliage from the carrot patch after thinning since this will only attract the carrot fly.
The carrot fly, in my opinion, is the carrot’s deadliest adversary. The smell of carrot foliage attracts it, and it descends to lay its eggs at the base of the foliage, where it meets the soil. The damage is caused by the carrot fly larva burrowing into the top of the carrot. The plant’s leaves will turn yellow, and the plant will eventually die.
Unfortunately, there is no cure for carrot fly devastation yet, but there are some preventative measures you can take.
First and foremost, remember that carrot flies are low-flying insects. As a result, if at all possible, grow the carrots in a raised bed that is at least 18 inches (450mm) off the ground.
The next tip is to cover the plants with a fleece material to keep the flies away from the carrots and their eggs.
To help disguise the smell of the carrots and distract the fly from growing carrots, try growing Allium plants like garlic or chives.
Harvesting/Storing:
From about July onwards, you should be able to harvest a successful carrot crop – hopefully! Most of the time, all you have to do is harvest the carrots as needed. They can be stored by cutting off the foliage about 1 inch above the carrot with sharp scissors, then placing them in a garden shed on a bed of dry sand. Make sure the carrots don’t touch each other and check for rotting on a regular basis.
The carrots will stay fresh and nutritious throughout the winter months if they are kept frost-free and lightly covered with sacking or other similar material. Knowing how to grow carrots from the ground up should help you have a healthy crop.
8. Onions
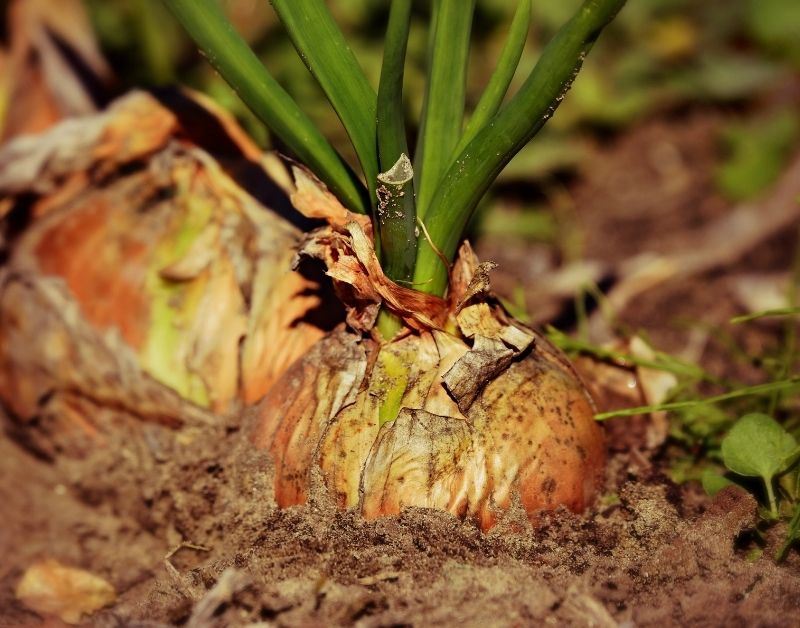
To begin, we must choose between growing onions from seed or from onion sets. The truth is that growing onions from sets rather than seeds is typically regarded to be simpler.
Unless you are an expert gardener who is familiar with the difficulties of germinating and growing vegetables from seed, it is also more likely that you will have a good onion harvest if you grow from onion sets.
How to start growing onions from seed?
As previously said, growing onions from seed is typically believed to be a more reliable technique to generate a decent harvest.
However, there are a few fundamental considerations to make before planting your onion sets in the ground. Here are a few general guidelines to guarantee that your efforts are fruitful and that your investment is valuable, both financially and practically.
Condition of the soil:
For starters, growing onions in the same bed for more than three years is not recommended unless the last harvest was disease-free and the soil was well-fertilized and capable of handling the needs of the growing onions.
If feasible, rotate your plants throughout the growing space to spread the burden’ and offer each plant the greatest possible opportunity for strong development, as is the case with most vegetable harvests.
Onions should be planted as early as possible (around late February) to ensure a lengthy growth season in soil with a ph of 6 to 7.5, and in the land that has been properly scraped to provide a fine tilth for planting the onion sets into. If you turned over the ground and put some well-rotted manure the previous Autumn, you should have had a nice vigorous spring growth – if not, remember that for next year:)
Plant the onion sets approximately 4 inches apart, in rows set about 1 foot apart, after pushing down the area a little (onions require a hard substrate). When it comes to weeding between the rows, this provides a roof for the hoe. In a tiny hole dug with the trowel, plant the onions and cover them with soil up to the neck.
Planting them this way will help keep them from rising out of the ground as the roots take hold; keep in mind, though, that you’ll probably have to re-set them a few weeks later to ensure this doesn’t happen. At this time, a tiny dusting of grow-more will assist in stimulating the onion sets.
Bird Protection:
Onions, unlike lettuce or cabbage, are not sensitive to birds such as pigeons. Inquisitive birds such as Blackbirds and Crows, as well as pigeons, are known to pick them up off the ground and leave them lying on the surface.
This is typically just a difficulty during the early phases of development, and after the onion sets have been adequately rooted, it is no longer an issue. However, if you are concerned about this occurring in your onion sets, you should cover them with a fine mesh to safeguard them during their early stages of growth.
Onions are ready to pluck when the foliage turns yellow and withers, which happens around August. Pick a dry day if possible and gently take the onions from the ground, allowing them to dry for a day or two. They may then be stored in a cool, dry location for the duration of the winter as long as they are kept free of frost damage.
Shaw’s that have dried and withered can be pleated together and hung in bunches from the roof of your garden shed, for example. The onions are ready to eat after around two weeks of drying out and should offer you a fresh supply for the following several months if you have produced enough!
A quick tip: Start with the ones with thick necks because they don’t last as long.
9. Potatoes
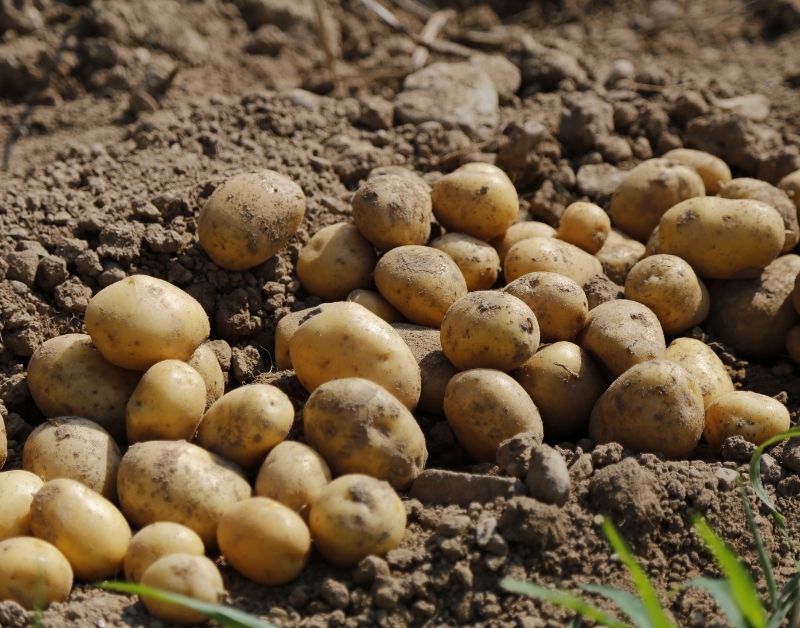
If you are a beginning gardener or have little experience producing vegetables, including potatoes, potatoes are probably the best vegetable to start with. The reason for this is that potatoes can grow in a variety of soil conditions and are quite resistant to the elements, but they prefer lower temperatures.
When the potato shaws are finished, they quickly grow to block out any sunlight surrounding their roots, so weeding is rarely necessary, save in the most extreme of circumstances, like when the plot has not been properly weeded.
Digging out the potatoes at the conclusion of the growing season is one of the most pleasant things a gardener can do. The prize for all of your hard work appears out of nowhere; it’s a bit like a treasure hunt, but this is a treasure that you planted and are now receiving with interest!
Purchasing Seed:
In addition to understanding how to produce potatoes, you must also know which varieties to cultivate. Potatoes come in a variety of shapes and sizes, some for baking and others for mashing. Potatoes that provide the greatest fries, and so forth.
The first guideline, especially when starting out, is to figure out which cultivars grow best in your location. A simple approach to find out is to go to a local supplier (rather than a major chain) since they will most likely have the finest variety of potatoes for your area.
You should begin by purchasing seed potatoes that have been raised expressly for this purpose. You could just plant supermarket potatoes, but this is not a smart idea because they may have been treated with pesticides to prevent sprouting while on display in the store.
If you’re truly stuck, you can just plant potato peelings. They will grow as long as the potato peelings keep an eye on them – it’s truly astonishing. I know I’ve grown potatoes just from peelings in the past, and while it wasn’t the nicest harvest, it’s still viable if you’re on a low budget, for example.
Preparing Seed Potatoes:
Before you even take them out of the bag, the seed potatoes will have started to sprout; this is a positive thing. If not, cover them with a bag or store them in a dark, cold spot for a few days until they have grown at least one inch. This is referred to as ‘chitting,’ and it indicates that they are ready to be planted.
Preparing the soil
Preparing the ground for producing potatoes is quite simple. Potatoes, in fact, are a wonderful first crop in areas where nothing has been planted previously, as they help to break up the soil. All that is required is for the soil to be dug over, preferably near the conclusion of the previous growing season, and then raked out to remove the majority of the stones and weeds.
After that, just draw a straight line to serve as a guide. Then, using the corner of the Dutch hoe, make a shallow groove along the line. Before planting the seed potatoes, sprinkle them with ‘grow more’ or basic fertilizer and space them approximately 10 inches (250mm) apart along the groove.
To enable the following stage, continue this method with the lines about 24-30 ins (600-750mm) apart.
Planting:
Place the potatoes in the groove, shoot side up. Although it is recommended that some of the shoots be broken away, and just one or two remain, I prefer not to do so and simply arrange them as they came. In any case, it doesn’t appear to have an impact on my potato yield.
After that, pick up the Dutch hoe again and raise the earth, first on one side, then on the other. This will build a mound that will grow potatoes along the length of the railway.
Some folks I know skip this step and simply plant the potatoes in the ground without drilling holes along the crop line. This, in my opinion, is the lazy man’s way out since it will result in a crop that is more difficult to harvest, resulting in broken potatoes. It will also result in a lower-quality harvest of potatoes.
Now it’s time to get back to work on the drills. Following the first lift, you must wait until her shaws appear through the dirt for a few inches. With the Dutch hoe, go over the drills once more and elevate the soil to cover the new growth.
That’s all there is to it! As the potatoes develop, water them as needed and keep an eye out for any predators. If all goes well, you may expect a bumper crop of wonderful fresh-grown potatoes in the fall.
Potato Plant Care:
One word of caution: keep an eye out for potato blight symptoms. This is a virus that can occasionally attach to your crop and damage it, and it generally strikes soon before harvest. An abrupt yellowing of the leaves, which quickly decay and fall over, is the first symptom of potato blight.
This is a disease that begins in the leaves and progresses to the tuber. Rather than attempting to prevent this from occurring, which is extremely difficult, Before the illness has a chance to infect the potato, I usually harvest the entire crop. Although the potatoes may not have reached their full potential, I will get a partial harvest of nice, nutritious potatoes.
Cutting one of the tubers in half is a simple method to check if it’s too late. The tuber itself has a black vein running through it. If this is the case, just dispose of them — but not in the compost bin, since the virus can survive for years in the soil.
If you try to store potatoes that have the potato blight, they will rot down to a stinking mush — it truly ruins your day when you reach into a bag for potatoes and bury your wrist deep into a rotting spud!!
Harvesting/Storage: Potatoes can be collected at any point throughout their growth cycle, as soon as tubers form; this is especially true if you want tiny, flavorful ‘fresh’ potatoes. To get the most out of your harvest, wait until the leaves and shaws are completely dry at the end of the growing season, then lift with a garden fork, removing as much soil as possible, and store in a cool, frost-free location.
If the potatoes are shielded from frost, they will last all winter. Covering a barn or shed with straw or sacking is a simple way to do this.
10. Tomatoes
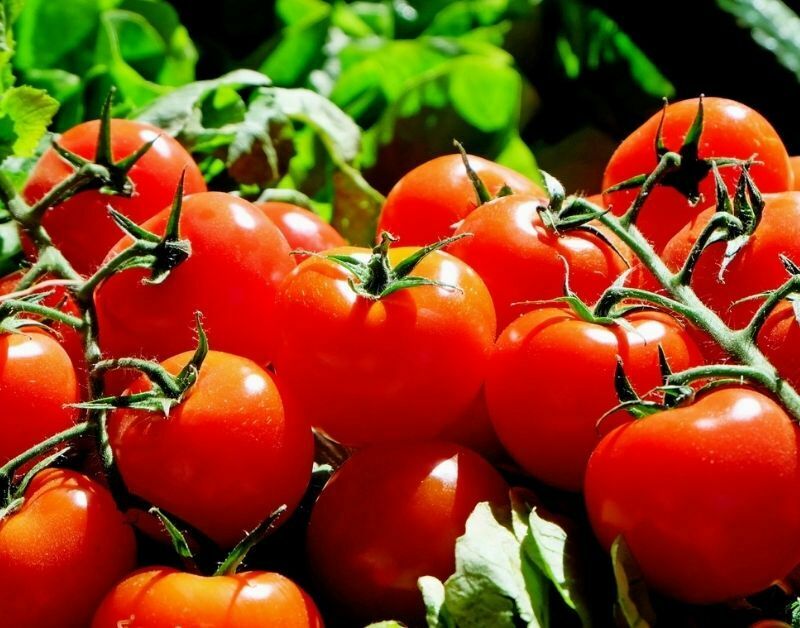
Growing tomatoes, or any other food, can be a highly fulfilling and enjoyable experience. Not only will you have the satisfaction of eating high-quality veggies grown by you, but you will also save a small fortune on grocery expenditures — a true win-win situation.
As with any food, we must first choose where we intend to grow it. For example, growing tomatoes outdoors in the deep south of the United States is very different from growing them in Scotland, where they will require the use of a heated greenhouse!
Weather and temperature conditions, as well as soil characteristics, must constantly be considered. Tomatoes grow best in full daylight, at temperatures ranging from 70 to 89 degrees Fahrenheit (21 to 29 degrees Celsius), and in well-fertilized soil, especially as the fruit begins to form on the stems.
Planting:
Although you can grow them from seed, which gives you a wider variety of kinds, I like to buy young plants that are about 6-8 inches tall and transplant them into the designated space.
They appreciate compost that is well-drained and has a lot of organic content, as well as well-rotted manure. Support in the shape of canes, rope, netting, or tomato cages will be required. This is especially true with beefsteak kinds (some weighing up to 1 pound), which can produce a crop that will put a lot of strain on the stem if not maintained properly.
When it comes to ‘feeding time,’ which would be around a ladle full once or twice a day when the tomatoes are in full bloom, I always like a ‘Tea’ mixture of horse manure mixed with water when it comes to organic Tomatoes, which should be begun when the first fruits start to show. It goes without saying that any type of manure or decaying material should be handled with caution.
Of course, a more environmentally friendly option would be to use a commercial tomato feed — there are several on the market – but chemical feeds require just as many safeguards, so I think it’s a case of picking your poison!
Organic growing methods, on the other hand, are clearly on the rise, and the feeding practices I used to save money as a kid are now all the rage — strangely enough.
Greenhouse Tomatoes:
Aside from the fact that tomatoes must be grown in greenhouses in any northern region where the climate is not warm enough for them, growing tomatoes in a greenhouse allows you to start the season much earlier. Just make sure you have a small heat source going to keep away a late frost or the cool spring evenings.
Tomatoes may be grown in a variety of indoor and outdoor containers. Be warned, however, that they cannot tolerate frost and must be protected from it at all costs.
As the season progresses and the temperature rises, it’s time to open the vents and attempt to keep a steady temperature of roughly 80 degrees Fahrenheit. It is important to water them on a regular basis and to prevent splashing the plant’s leaves since this can cause the foliage to be scorched in the hot sun.
I generally clip away the extra leaves about midway up the plant as the plants grow and the tomatoes begin to show. This will direct the plant’s attention to producing tomatoes rather than merely filling the leaves. Side shoots should be nipped away with your thumb and fingertip as well since they will deplete the energy available to your tomatoes on the main stem.
Avoiding pests with tomatoes
Without a doubt, pest control is an ongoing task for all gardeners. Growing tomatoes in a greenhouse means plants are less susceptible to caterpillar attacks, and if they do develop, they can generally be quickly identified and removed. Tomato plants, on the other hand, are extremely vulnerable to aphids such as greenflies and blackflies with lasagna gardening application. Chemical control of aphids is certainly the most common and maybe the simplest method.
It should be noted, however, that any pesticides used on your food plants are likely to remain on the fruit or vegetables treated to some extent. Going organic and considering other chemical-free alternatives, such as a tablespoon of Canola oil and a few drops of Ivory soap in a quart of water, might be the answer.
Shake thoroughly before pouring into a spray container. Spray the plant from the top down, making sure to reach the undersides of the leaves to check for pests.
Support
To reiterate the previous advice, there is no one-size-fits-all solution for supporting your tomato plants as they develop, but they must be sustained. Canes are the most common, although string inserted into a spike in the ground at the foot of the tomato plant and fastened to a supporting beam in the greenhouse roof would suffice.
Ensure that the plants are securely attached to the string or cane – without choking the stem – and that the tomatoes’ weight does not drag them down.
Growing Tomatoes Outside:
Those who live in warmer climates – unlike Scotland – have the advantage of growing tomatoes outside. The idea, on the other hand, is essentially the same.
The primary differences are that the general temperature cannot be regulated as well and that outdoor tomatoes are more prone to pest predation from caterpillars, slugs, and other insects. In fact, the fundamental distinction is that they are more exposed and so susceptible.
Feeding the tomatoes is the same as inside; however, if you have healthy soil, you may not need to do so as frequently. Of course, insect control will continue, and garden mesh will be used to keep birds away. Rabbits aren’t particularly fond of tomato plants, but they’ll chew on them just for the sake of chewing – so keep them away by any means necessary.
Tomatoes are best consumed within a few days of plucking for the finest flavor; however, if kept, just place them in a paper bag and store them stem-up in a cold dark spot.
Green tomatoes, contrary to common opinion, do not ripen well on a window sill and are more prone to spoiling.
When the tomato is firm and bright red (or yellow?) in color the best time to harvest it is when it is firm and bright red (or yellow?) in color – depending on the variety, of course.
They may be stored in the fridge for a few days, but most of the natural tomato flavor will be lost.
Happy lasagna gardening!