Placing plants or planting plants requires some specific instructions if your plants have the best chance of growing and thriving in your tank. There are three main “categories” of plants whereby the techniques of “planting” remain about the same. We’ll detail each major category and then offer some specific and unique plant species as well.
Here is a detailed explanation about live aquarium plants planting tips for beginners; what to do and avoid…
But, before we get into how to plant your new plants, let’s talk about where and how to get them. Ideally, plants should be purchased from local hobbyists at a club meeting and auction.
This is the most acceptable place to get genuinely healthy plants, and the selection is generally significantly superior to that of your local fish shop.
Most online sellers provide a large selection of healthy plants, but shipping during periods of extreme heat or cold, as well as shipping delays, can be problematic; however, I’ve found online purchasing to be preferable to ordering from a local nursery (Local Fish Store).
If you can only buy plants from your LFS due to circumstances, you’ll have to be very picky about the health and quality of the plants you buy. Unfortunately, the majority of LFS do not keep plants in healthy settings.
In most cases, the plants are in a slow downward spiral of death. Scrutinize the plants and avoid any plants with mushy roots or stems. Avoid plants that the leaves are easily dropping off.
Basically, if the plants look brown, ill, and/or mushy, don’t buy them. Many beginners make the mistake of believing that they can buy these “sick” plants and nurse them back into good health.
While it’s possible for experienced hobbyists to “save” plants, it’s best for the less experienced aquatic gardener to avoid the problems associated with adding dieing nutrient leaking decaying plants to their tanks. The bottom line point to be made here is to start with the healthiest plants possible.
Planting Instructions for live aquarium plants:
Before planting, I remove any leaves, roots, or stems that are mushy or heavily coated with algae. On the other hand, the plants you buy should have very few of these issues.
If they do, you should look for a different source. Plants purchased online should arrive in perfect condition, with no algae and very little dead material. I’ll repeat it: picking healthy plants is critical for beginners. It’s best not to try to “nurse” plants back to health until you’ve developed your “green thumb.”
Where to buy aquarium plants?
You can buy them from your local store, or preferably you can choose Amazon aquarium plants to be on the safe side. Then, if there is a damage or unwanted situation with the plant, you can return it hassle-free and not waste your time.
A lot relies on the type and variety of plants you’re employing when it comes to gardening. Several factors influence whether or not you remove the potted plants from their containers. Do you utilize UGF/RUGF products? What kind of substrate are you working with? Substrate thickness.
However, the following is a highly generic description of how to plant several types of plants, with the caveat that there are deviations in each category based on species.
(Watch this video!)
Stem Plants:
Bacopa, Cabomba, Water Sprite, Water Wisteria, Ludwigia, Rotala, Hygrophila;
Cut back to any breaks, remove the leaves from the bottom 34 inches, and press into the substrate. They appear best when arranged in groups of five or more objects that are spaced about 0.5 to 1 inch apart.
Plants with rhizomes and tubers/bulbs:
Great beginner plants, Java Fern, Anubias, Aponogeton;
Anubias and Java Fern may be anchored to rocks and/or driftwood, where their roots will finally grip and cling on. They can be planted directly on the substrate as long as the rhizome is visible above the surface. Make sure the part of the plant that will produce bulbs is pointing up.
Rooted Plants:
This is the category with the most variety. Because I don’t use UGF/RUGF, I remove the pots and any fiber material (Rockwool) from the roots, then clip the roots down by a third.
Then, cut a hole in the substrate large enough to hold the root ball and insert the plant as deep as possible, fill up the hole, and carefully lift the plant up until just the crown of the root is visible. If you’re utilizing them, I recommend leaving UGF/RUGF in their pots. This prevents roots from tangling in the UGF/RUGF plates.
Resist the temptation to add any fertilizer! Instead, please wait until the plants begin to grow and their roots settle in. This can take from one to four weeks, and even then, it’s best to wait until the plants show signs of needing nutrients.
Parts of a plant:
Node: The point on a plant stem where a leaf or leaves are attached; the point on a stem from which new leaves or branches will grow.
Internode: The part of a stem or branch between nodes.
Stem: The main stalk of a plant to which branches and leaves are attached.
Crown: The part of the plant where the roots and stem join.
Root: The usually underground organ that lacks leaves or nodes absorbs mineral salts, and usually it anchors the plant to the substrate.
Water roots: Root hairs sprouting from the plant nodes.
Species-Specific Instructions:
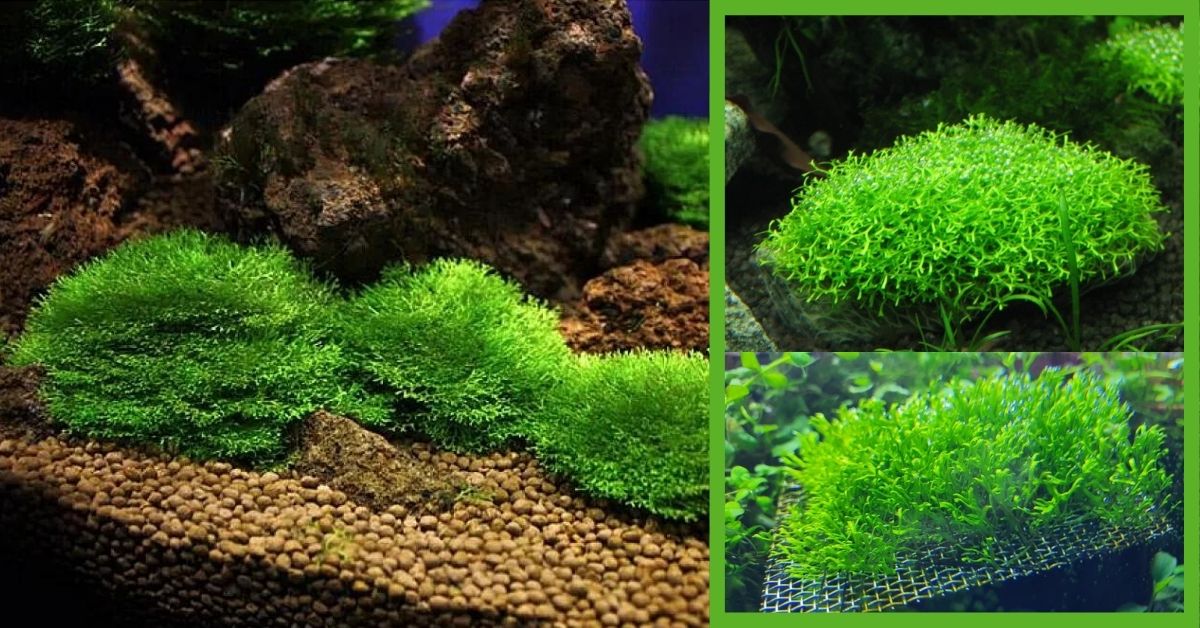
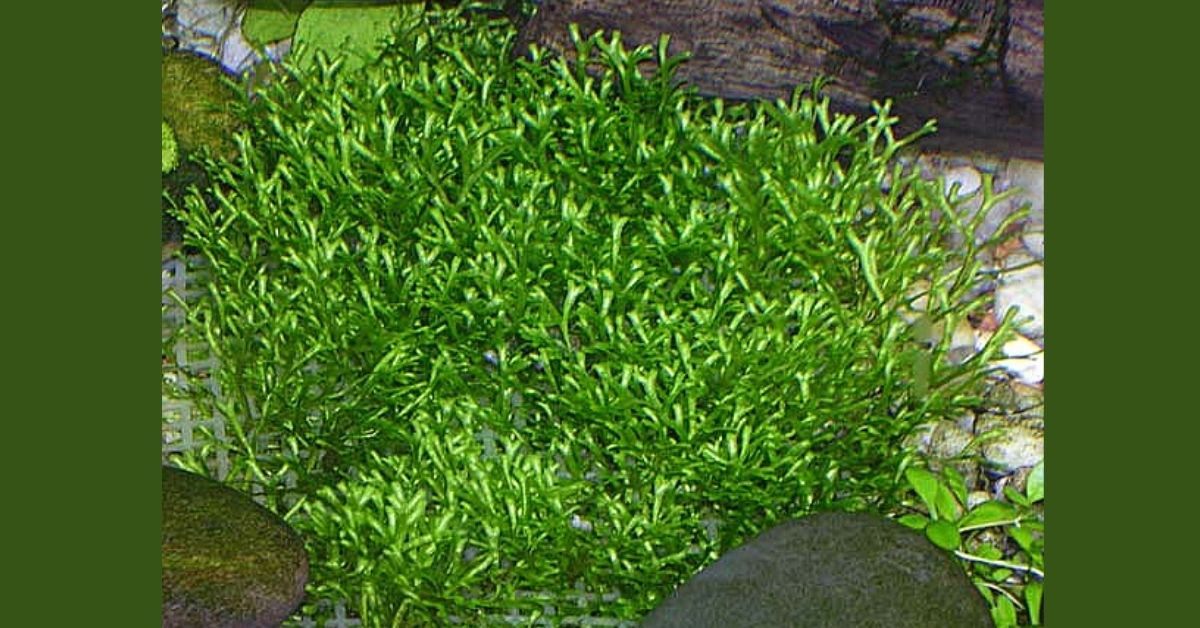
Riccia fluitans: This article explains how I submerge a floating plant and force its development. Riccia fluitans has a love-hate relationship with me. I enjoy how it gives a tank a “feel”; I particularly appreciate the gentle mounds of Riccia fluitans in the front.
On the other hand, Riccia fluitans produce shambles, thus the “hate” part. It only takes a few little pieces to “escape,” and you’ll have Riccia fluitans growing in all of your other plants, as well as loads of it floating on the surface, obstructing filter intake strainers.
I’ve started employing a method that appears to help reduce the mess while still allowing me to keep my prized mounds.
Here’s a step-by-step of how I do it:
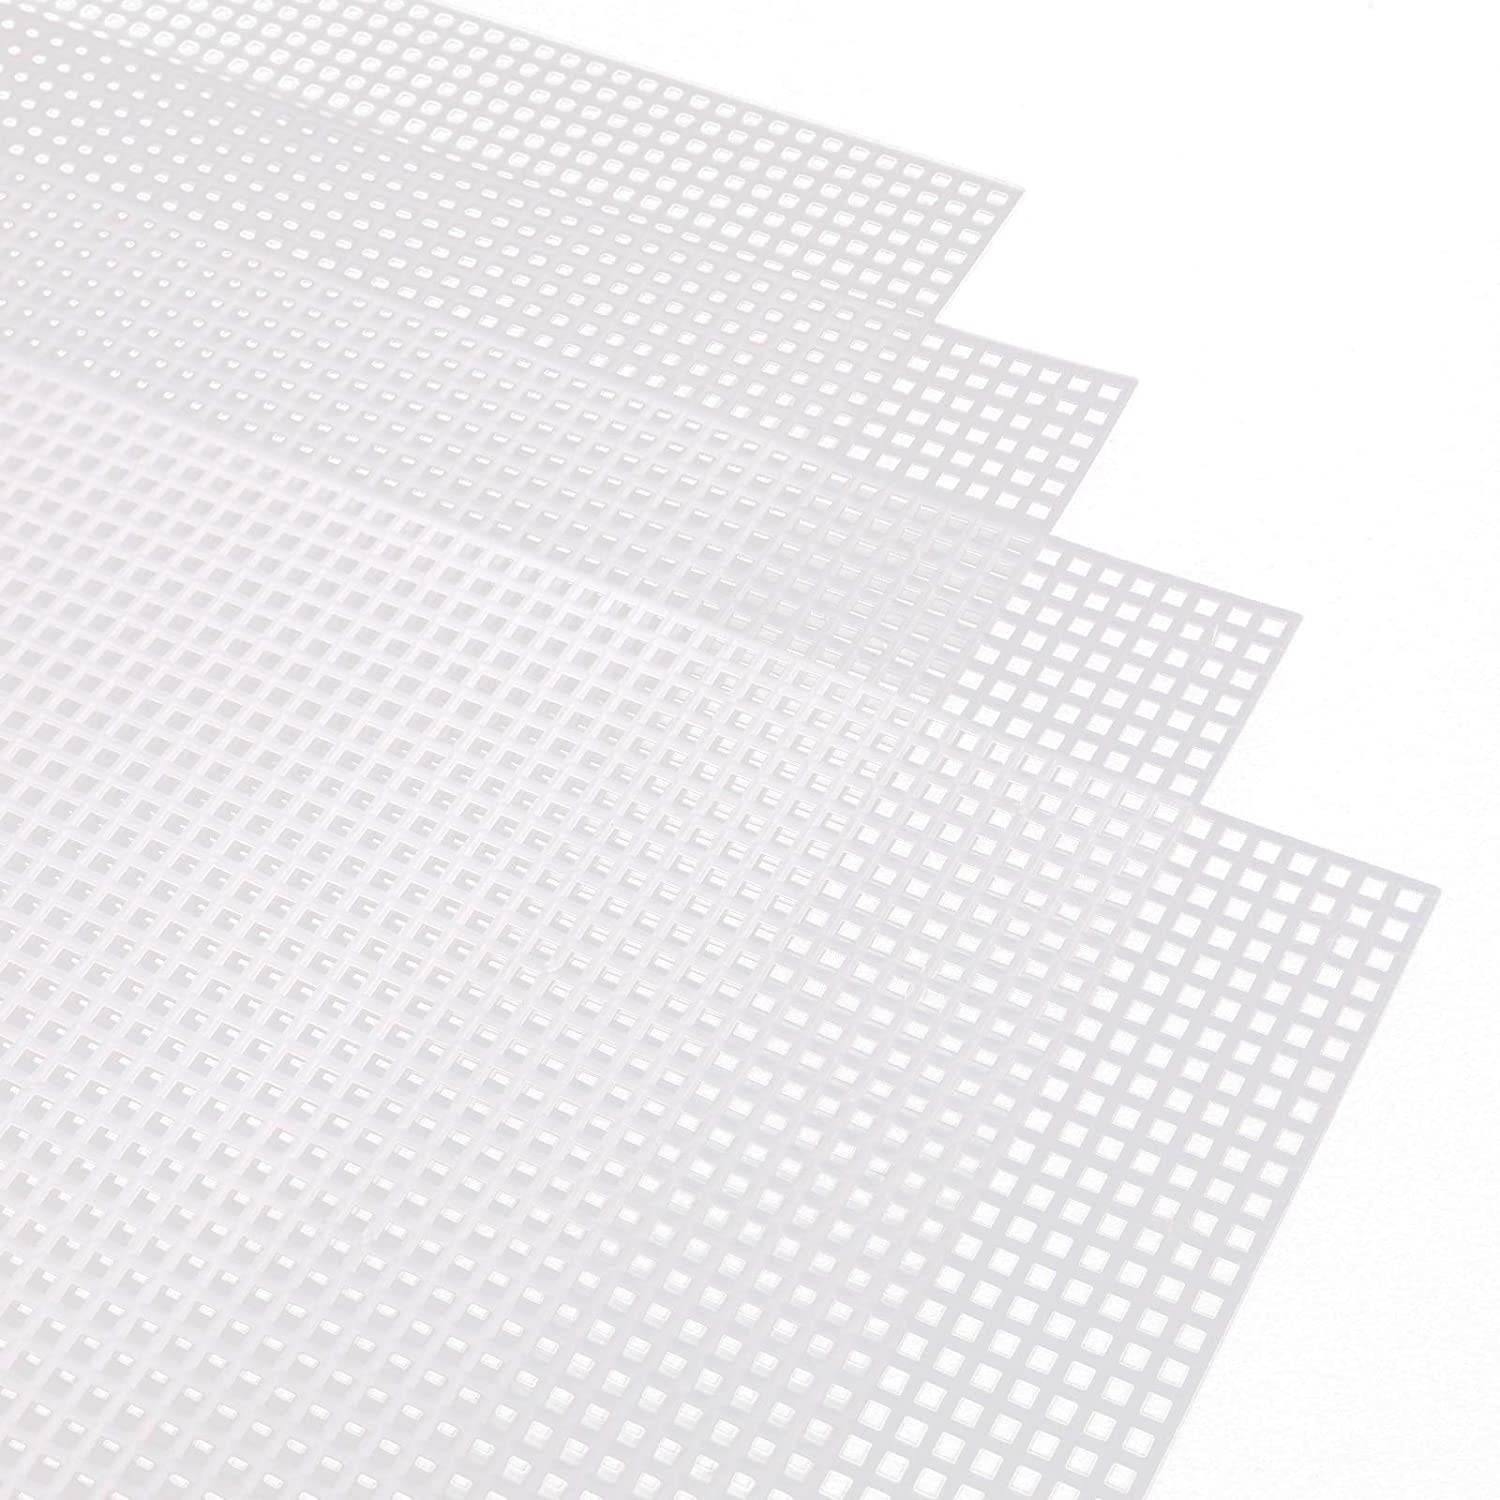
I purchased these little needlepoint plastic grids at a craft store. A bag with several shapes and sizes was about $2.00.
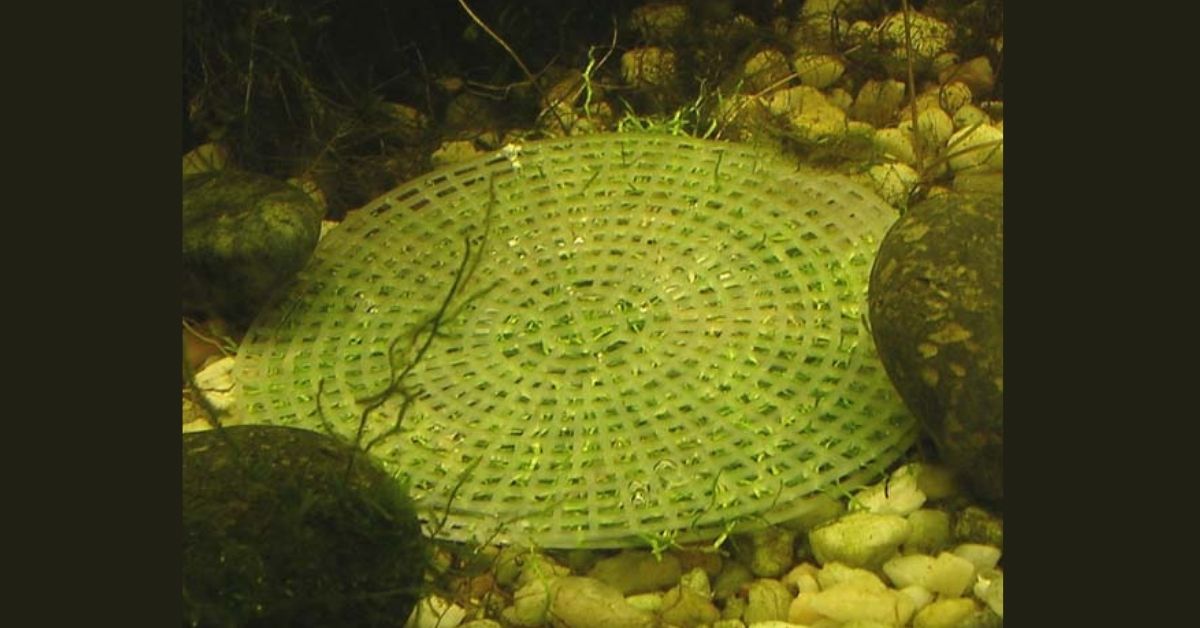
Thankfully the shapes come in pairs. I take a portion of Riccia and spread it thinly across the top of one of the grid pieces.
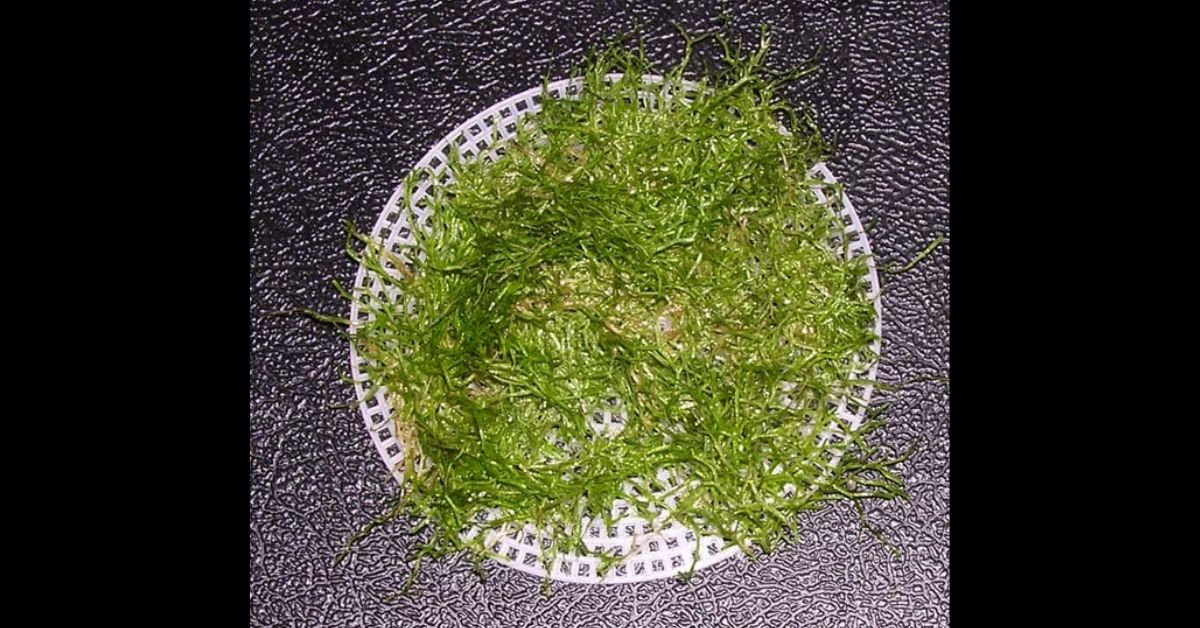
Then I take the other same-sized grid, place it on top of the Riccia and staple the two grids together, making a Riccia sandwich.
These are then placed in the tank and weighed down with rocks.
You can buy those similar grids on Amazon:
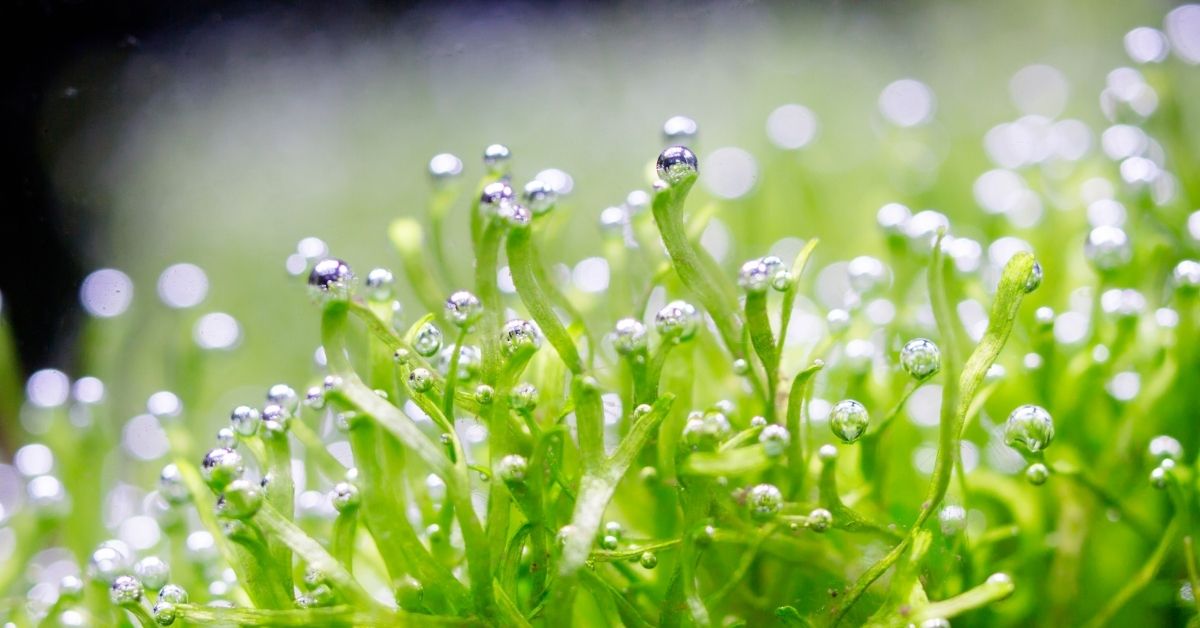
Given plenty of light and CO2, you will have a gorgeous pearling mound of Riccia in a few short weeks.
The grided Riccia are fantastic since you can remove them from the tank for pruning without making a massive mess in the tank. If you wish to modify the aesthetic of your aquascape, the grided mounds of Riccia may be readily relocated. It’s worth noting that Glossostigma is a great companion plant for Riccia and can be used to “hold” it down. However, upkeep will be substantially higher.